Here's a recap of the cooking we did this year for the holidays:
I meant to make Pizzelle (1/22/11 post) here, but never got to it. I will have to do that soon.
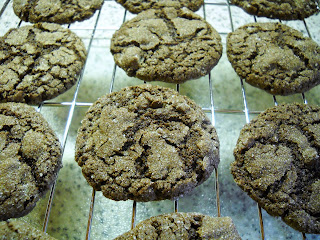
John made some Peanut Butter Cookies (10/3/10 post) here, to share with friends, but then there were plenty of leftovers to put on our table at home.
We did, however, make Italian Almond Cookies (6/25/11 post) here, decorating some with whole almonds instead of slivered almonds.
We also made my famous Almond Biscotti (1/2/11 post) here.
We couldn't forget "The World's Only Good Fruitcake" (12/29/10 post) here.
And, of course, the Christmas Pierogi for Christmas Eve (12/26/10 post) here .
It's important to use every last bit of our HoneyBaked Ham in soup (1/30/11 post) here.
We had company during the week between Christmas and New Year, so I just used my Family Favorite Beef Stew recipe (12/8/10 post) here. That, combined with the GF Cheese Biscuits from Whole Foods, makes a nice dinner. We topped it off with leftover Christmas cookies (as mentioned above) and some ice cream.
Good thing I enjoy cooking!
Saturday, December 31, 2011
Saturday, December 24, 2011
Gluten Free Holiday Peppermint Brownies
Merry Christmas!
These are delicious.....
Preparation:
Put out two sticks of butter (1 cup) to soften.
Preheat the oven to 350.
Take out a 9x13 pan. Spray it with GF cooking spray.
Step One: The Brownie Layer
Take out your mixer. Put one stick of the butter (1/2 cup) inside the bowl.
Run the mixer to cream the butter.
Slowly add:
1 cup of sugar, and
two eggs.
Take two 1-ounce squares of unsweetened baking chocolate.
Put this in the microwave to melt. It doesn't have to melt all the way.
Once it looks kind of melt-y, just stir it up with a teaspoon until it's smooth.
Drizzle this into your butter mixture as the beater runs.
Stir in:
1 cup of gluten free flour, and
1/2 cup of chopped nuts.
Pour this mixture into the pan. It will be stiff.
Use wet fingers to smooth it down.
Bake 20 minutes. Remove and allow to cool.
You can turn off the oven now.
Clean your mixer because you need it for the next step, too!
Step Two: The Peppermint Layer
In the mixer, place 1/2 stick (4 Tbs) of the butter.
Run the mixture to cream the butter again.
Slowly add:
2 cups of confectioner's sugar (a.k.a. powdered sugar),
2 Tbs of water, and
1/2 tsp of peppermint extract.
If you dare, taste this mixture.
This can be dangerous: you may not want to stop tasting the mixture!
(Perhaps you can limit yourself to licking the beaters?)
Put this amazing peppermint concoction into a small bowl and cover it with some plastic wrap.
Clean up your beaters and mixer bowl.
By now, your brownies might be cooled. If not, go have tea and check it out later.
Spread the peppermint concoction onto the cooled brownies.
Step Three: The Chocolate Drizzle
Melt 2 more 1-ounce squares of unsweetened baking chocolate, as before,
but add 2 tsp of sugar to it.
(Alternately, you can use two 1-ounce squares of semi-sweet baking chocolate without the extra sugar.)
When you go to stir this all up, add 2 Tbs of your softened butter.
(Yes, you will have 2 Tbs of butter remaining. Return that to the fridge.)
Stir this all up and make sure it is of drizzling consistency.
Drizzle this all over your nice white peppermint top to make a pretty design of your choice.
Chill in the refrigerator.
Cut in to squares.

Saturday, December 17, 2011
Singing a Song
The day after Thanksgiving, I always tune into a local FM radio station, "Lite 100.5." This station plays strictly Christmas music from Thanksgiving through Christmas. Others think I am nuts at first, but then don't complain as we listen to toe-tapping beats of familiar tunes.
I figure that there is one month out of twelve that I get to do this, so what the heck?
As I pondered why I like Christmas music so much, I decided that it is some of the most "singable" music around. We all know the tunes and the words (mostly), so belting out a few lines comes naturally.
I am sure that my musically-inclined friends will agree that singing is good for the soul.
I am thinking that singing a song a day will be a good New Year's Resolution. I have already been trying to sing out loud a tune from the radio as I drive to work, whether I feel like it or not.
Other singable songs include songs from the "Great American Songbook" and Country music.
Yes, singing a song a day will make a good New Year's Resolution.

Saturday, December 10, 2011
The broken branches hold on to their leaves!
After the devastating Halloween snowstorm, the treescape has changed.
One sees the typical December bare branches, but they are interspersed with downward-facing broken limbs. These limbs continue to sport dead leaves.


It appears that nature has something here. To remain alive, the tree needs to drop the unnecessary leaves. The dead branches hold tight to them.
There is a time for getting rid of things. For cleaning out your closets. For putting aside pettiness. For saying goodbye to some aspects of your life, secure in the idea that Spring will arrive eventually.
Interesting that this happens just before the December holidays (i.e., Advent) and the New Year.
I guess we should take these things out to the road, assuming there is pickup service available.

(Hey, if I can't wax philosophical on my own blog, when can I?)
Sunday, December 4, 2011
Sunset in Newport
We took a quick trip to Newport, RI, yesterday. The Newport Winery had one of their special tastings. It's always fun.
Having some household tasks to accomplish at home, we didn't even leave our town until after noon. It's a good two-hour drive, but that gave us enough time to do what we really needed to do.
When I visit Newport, I have to take the Ocean Drive and view the water near Brenton Point. It's breathtaking.
We climbed down to the rocky area to collect my favorite type of rock: the nice smooth, rounded, and fairly flat ones. These are fun to stack in a zen-like fashion.

Strange....in all these years, I never realized that there is a fantastic view of the sun setting over the water from there.
I ran around, clicking photos left and right. I attempted to get a photo of BOTH the sunset and the waves crashing against the rocks, but that didn't quite pan out.

A group of three young adult women asked me to take a video of them with their camera. Delightfully, I filmed them speaking in Spanish, creating a "commercial" for a brand of makeup, as a class project. They were incredibly cute.
Time passed quickly. I didn't even notice how chilly it was getting until we actually got into the car.
As we drove, we discussed how sunsets always seem brighter in the colder weather. I guess it takes a little bit of chill to achieve clarity of vision. There may be a parallel to life there somewhere....
We didn't get a chance to go shopping at the Brick Marketplace, which we often do. We wanted to drive a little way, get some dinner, and arrive home at a reasonable hour. But heck, I already had my rounded rocks (and my photos) as souvenirs.

Saturday, November 26, 2011
Knitting & Risk
This fall I obtained the measurements of my daughter's Miniature Schnauzer, with the intention of making a sweater for him. Thinking it should be done prior to Thanksgiving, I got it started in late October.
As I progressed, however, doubts continually surfaced. Will the neckline fit over his head? Is this *really* where his forelegs go? Will it be long enough? Gosh, this looks strange!!
I did not have the luxury of holding it up to the dog to check.
The Halloween snowstorm gave me some unexpected time to knit. I had it finished by the time my son-in-law stopped by to help us with some storm clean-up.
"Do you think it will fit him?" I asked. Hard to tell. A dog sweater looks nothing like a people sweater!
A few days later, they were visiting for some birthday celebrations. It wasn't the dog's birthday, but he got the sweater as a gift, anyway.
Lo and behold, it FIT! Not only that, he didn't mind wearing it!
From this story, I have been thinking about the need to take a risk once in a while. It doesn't have to be a risk to the degree of jumping out of an airplane, but it's good to try something new...
because feeling proud of a new accomplishment is a good thing.

Sunday, November 20, 2011
Thanksgiving 2011
Ten offbeat things I am thankful for this Thanksgiving, in no particular order:
-Getting the daily paper and listening to hubby gripe about the articles.
-Hearing a loved one giggle at the daily comic strips.
-Wood chippers....
-Listening to "Guy Noir - Private Eye" on A Prairie Home Companion.
-Sons who play guitar.
-Daughters who like cowls knitted by their mum.
-A cup of green tea, along with peanut butter on toast, for a quiet lunch.
-Having paper and pens always on hand to jot down ideas.
-Having a job that I enjoy 98% of the time. (approximately)
-My blog!

Sunday, November 13, 2011
Four Trailer-Loads
Saturday mornings are delightful. It's the only day of the week that I can actually get up when I please, which is never very late by any standard (but for a person that gets up at 4:30 4x/week to exercise, even 6 am feels luxurious).
Yesterday's plan was to work with hubby carting four trailer-loads of branches and cut-up trees to a temporary bulky waste site that the town set up for storm cleanup. I lay in bed wondering what flavorful nugget I would find in the day. Yard work is not my "thing."
The weather was crisp, with a slight breeze. At first, the tips of my fingers became numb (in spite of the work gloves). Okay, pay attention to good things instead, I reminded myself.
Under the pine trees, as we piled branches and cut up wood with a sometimes-functioning chain saw, the aroma was lovely.
It is kind of nice to work together with hubby. He is really pretty easy to get along with. I just did what I could, and felt good about being there to help.
By our late lunchtime, I was starving. Food tastes better when you are starving.
I spent the afternoon doing some cooking and housework. By 8:30 pm we were both in bed, exhausted from the day's work. However, physical exhaustion is a lot more pleasant than emotional exhaustion.
Aromas. Teamwork. Food on an empty stomach. Sleep for a tired body.
Not a bad day!

Sunday, November 6, 2011
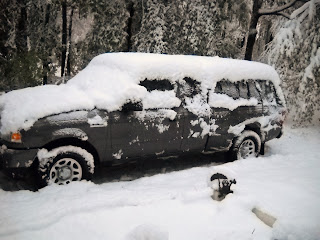
A Challenging Week
On Saturday evening, we came home just as the uncharacteristically early Fall snowstorm was rolling into our town. We heard the cracking and crashing of tree limbs all night. 12 to 24 inches of wet, sticky snow fell on our trees still loaded with leaves. The next morning we woke to this:


The cleanup will continue for many months to come. In the process, however, we will realize that however challenging the times may be, they will pass.
And that's a good thing.


Trees were down everywhere, making travel impossible. Power was out in at least 99% of the town. Gas stations could not pump. Thankfully, the sun came out and the days were good for fixing things. The nights, however, were chilly.

It took an more than an entire week to get power back to most of the town.
People were very frustrated.

Eventually, power was restored. People were able to go back to their homes if they had abandoned them in frustration (as many did).

The cleanup will continue for many months to come. In the process, however, we will realize that however challenging the times may be, they will pass.
And that's a good thing.
Friday, October 21, 2011
A surprise can make a day brighter.
Yesterday I had a usual workday, but at the high school where I was heading, there was to be an assembly. The new commissioner of education was supposedly bestowing some kind of award on the school for "excellence." Well, I know we are excellent, but darn, why did this have to occur on the one day of the week that I head there? This will certainly effect the entire day's schedule....
I left the house early, assuming that parking would be a problem. It was! No itinerant spaces were available. I had to go around the back of the school, then drag my rolling bag, a lunch bag, two canvas bags holding language tests that I might need, and my purse to the front door. In the misting rain.
Okay, I was there early, and feeling a sense of responsibility to know what the heck we are actually getting "recognized" for, I went up to the class where my first student would be. My plan was to sit with the students, watching the assembly on closed-circuit TV. (Primarily Juniors and Seniors would be attending due to space issues.)
Lucky for me, I started taking notes so that I could tell hubby a few things about the assembly.
We met the new commissioner, were introduced to board of education members, town council members, and of course heard from the school principal and superintendent.
The concert choir sang a beautiful piece.
Then we heard from a woman. She had come all the way from California.
Something was a little weird about this assembly. It started to have a game-show quality as she informed us that the Milken Family Foundation wanted to give one of our teachers an award. A monetary award. A pretty good one, too!
The teacher was called down. A science teacher. I'm not familiar with him, and I'm sure he's well deserving of the award. BUT....
Even he didn't know about it!!!
I sure was glad I took notes. After everything was over, I discussed with my student the main idea and details of what happened. In the short amount of time that we had, we created a word document of information that she could bring home to show her mom.
I wound up giving these sheets to all my students. Nothing better than a speech-language pathologist fostering family communication!
A day with an anticipated pain in the neck assembly turned into a sparkle in my heart.
Best wishes to all of the Milken Family Foundation winners!
Saturday, August 27, 2011
Fresh Tomato Sauce

Last night we had a bunch of fresh tomatoes which were given to us. I was out having coffee with a friend, went home and decided that I needed to use all of them. How should I do that with the limited time I had?
Well, first off I let hubby know dinner might not be quite ready when he got home!
Somehow I got a pasta dinner together in about 1 1/2 hours. It's a fair amount of work, but the result was great!
Fresh Tomato Sauce with Basil
1. Fill a 2-qt saucepan about 2/3 full with water and heat it to boil.
2. Put a 4-qt saucepan on the stove with 2 Tbs of olive oil. Add one onion, chopped. Let it cook a few minutes while you proceed to the next step.
3. Wash ~4 lbs of tomatoes. Drop them into the boiling water 2 at a time. When the skins have blistered, pull them out with a slotted spoon. Put them into cold water until cool enough to handle, then remove the skins. Cut tomatoes in half and remove green/hard parts. Poke your fingers through them and let all the seeds slide out into a trash receptacle. Hold what is left over the 4-qt saucepan, and squish them into the pan to join their onion and oil counterparts. Keep doing this until your tomatoes are all in the pan. Yes, this is messy but if you do it with a CD of Andrea Bocelli singing in the background you will feel creative and romantic.
4. Add 1 tsp salt, 1 tsp sugar, and black pepper to taste.
5. Get yourself some fresh basil, a nice bunch of it. Rinse it off and shake it dry. Grab some clean kitchen shears and trim off irregular pieces of basil leaves. Drop these into the 4-qt pan as you cut.
6. Let the whole thing simmer on medium-low for about an hour, uncovered.
7. Meanwhile, heat up some water in yet another pan to cook up some gluten free pasta.
8. As your pasta is cooking, decide it you want to eat your sauce chunky, as we did, or if you want it thicker. I figured if I wanted it thicker I could have put in some tomato paste, but we decided to leave it alone. Also, if we didn't want the watery broth, I could have pureed the whole thing in the pan by using my hand blender. We didn't do this, either.
9. Toss pasta with some of the sauce. Serve with extra sauce and parmesan. Consume with pride.
10. Smile!

Off the Handle: A few more desserts and photos
Katie and Andy celebrated their first anniversary last weekend. We had them and other family members over for dinner and a delicious gluten free cake, using a recipe from the book, The Cake Mix Doctor Bakes Gluten-Free by Anne Byrn. The cake was an orange cake, filled with lemon curd, and frosted with a cream cheese frosting. It was fabulous.


Their new miniature schnauzer, Dogmatix, joined the celebration. He is adorable!

I had also made some cookies for John from yet another cake mix. This one used a chocolate cake mix that also has cayenne in it, for a spicy touch. John loves it. This time I used the cake mix, 1 egg, 1/4 cup of melted butter, 2 Tbs of oil, and 1 tsp of vanilla. I then added about 3/4 cup of mini chocolate chips. I rolled them in sugar, as with the cookies of 7/22/2011, and baked them (using parchment paper to line the cookie sheet) for 12 minutes at 350, as before. I like the way these came out better. They had more of a cookie-like texture (as opposed to a cake-like texture).

A day after that, we went to a car show in Granby, CT. The sunset was beautiful. Here it is:

Thursday, August 18, 2011
Off the Handle: Peanut Butter Rice Crispie Treats
Yesterday I decided to make Rice Crispie Treats, considering that Kellogg's has come out with a gluten free version of this classic cereal. Add to that, I came across a bag of Campfire Marshmallows, with the words "gluten-free" clearly marked on the bag. YaY!
I used to make these all the time when the kids were little. Easy and delicious!
I had my own way of doing this, substituting peanut butter for margarine or butter.
(I have a life-long passion for peanut butter.)
Mmmmm. I was looking forward to this!
I found that old recipe and got started.
The "giant roaster" marshmallows that I got were just about 1 oz. each.
Ten marshmallows, add peanut butter, put in microwave, measure cereal.....
Oops! The marshmallows were flooding all over my microwave!
Luckily I had lots more marshmallows and stuff.
Cleanup wasn't too bad. I was actually laughing over it all.
Here is the REVISED version of how I make my Rice Crispie Treats.

Peanut Butter Rice Crispie Treats
(makes 24)
Spray a 9 X 13 glass pan with GF cooking spray.
Into a LARGE (12 cup) microwaveable pyrex bowl, measure out:
10 oz gluten free marshmallows, and
1/4 cup smooth peanut butter.
Put this in the microwave, and cook 2 minutes on high,
watching closely that it does not puff up so much that it overflows.
Stir. Microwave 1/2 to 1 minute more
Dump in 6 cups of Gluten Free Rice Crispies.
Using a rounded knife or a spatula, stir everything together well and quickly.
Press the mixture into the pan, spraying your fingers or the top of the mixture with your cooking spray. (This keeps it from sticking to you!)
Cut into 24 squares.
Sunday, August 7, 2011
Off the Handle: Ice Cream Crunch Cake
I recently came across a glutenous recipe that I could tell would adapt nicely to a
gluten-free dessert. I knew it would be perfect for one of the many birthdays
in my family during the month of August. This was DELICIOUS!


gluten-free dessert. I knew it would be perfect for one of the many birthdays
in my family during the month of August. This was DELICIOUS!

Ice Cream Crunch Cake
(Serves 8-10)
Take a 8 or 9-inch springform pan.
(Mine is 8 or 8 1/2", depending on how you measure.)
Line it with foil.
Spray that with a little GF cooking spray.
Measure 4 cups of Gluten Free Rice Crispies into a large bowl.
In a smaller microwave-safe bowl, place
3/4 cup of GF chocolate chips, and
3/4 cup of creamy peanut butter.
Microwave 1 minute to 1 minute + 20 seconds.
Stir until chocolate melts and the mixture is smooth.
Add the chocolate-PB mixture to the cereal and carefully combine the two.
Press this cereal mixture onto the bottom and up the sides of your pan.
This is the tricky part.....it gets sticky. I used wet fingers.
Buttered fingers or fingers sprayed with above cooking spray may work well, too.
Place this into the freezer.
At the same time, remove from your freezer:
a half gallon container of the best ice cream you can find,
in a chocolate chip flavor.
(You won't need all of this for the cake,
but you will need extra for after your cake is gone.)
Wait 10 minutes. Clean your bowls while you are waiting.
Take the pan out of the freezer and fill the empty space with the ice cream,
using a sturdy spreading spatula.
I placed mine in by piling on thin slices and then spreading them together.
Take 2 Tbs of cocoa powder.
Place this into a small strainer with a fine mesh bottom.
Holding the strainer over the cake, tap it with a spoon.
By moving the strainer around as you do this,
you can create a nice cocoa powder topping to the cake.
Cover the cake with plastic wrap.
Place in freezer for 4 hours.
Remove cake from freezer about 10 min before serving.
Remove from springform pan and wrappings.
Place it nicely on a pretty plate.
Remove from springform pan and wrappings.
Place it nicely on a pretty plate.
Cut into slices!

Wednesday, August 3, 2011
Sausage and Cabbage Medley
We went for a walk the other day and saw three red tailed hawks, but I didn't have my camera on me. The following day we saw one in a tree. I took this photo.


The day after that we didn't see any at all. I'll keep looking!
I had a bag of cole slaw in the refrigerator and decided to use it in a cooked dish. I came up with this one!
Sausage and Cabbage Medley
(Serves 3 1/2)
Start cooking 1/2 cup of dry rice to make two cups of cooked rice.
Preheat the oven to 350.
Take one 12-oz package of cooked chicken sausage.
Slice it thinly, and place it in 12-inch cast iron skillet.
Heat it a little on the stove to get it going.
Add one onion, chopped.
Layer on one 14-oz bag of cole slaw mix (from the produce section)
and the cooked rice.
Mix in a bowl:
15-16 oz canned tomato sauce,
1 Tbs brown sugar,
1 Tbs lemon juice, and
1 Tbs Worcestershire sauce.
Pour this over the cole slaw mixture in the skillet.
Cover loosely with foil.
Bake 40 min,
uncover, and
bake 20 minutes more.
Stir the mixture before serving, and
sprinkle it all with parsley.
Serve with parmesan and freshly ground pepper!
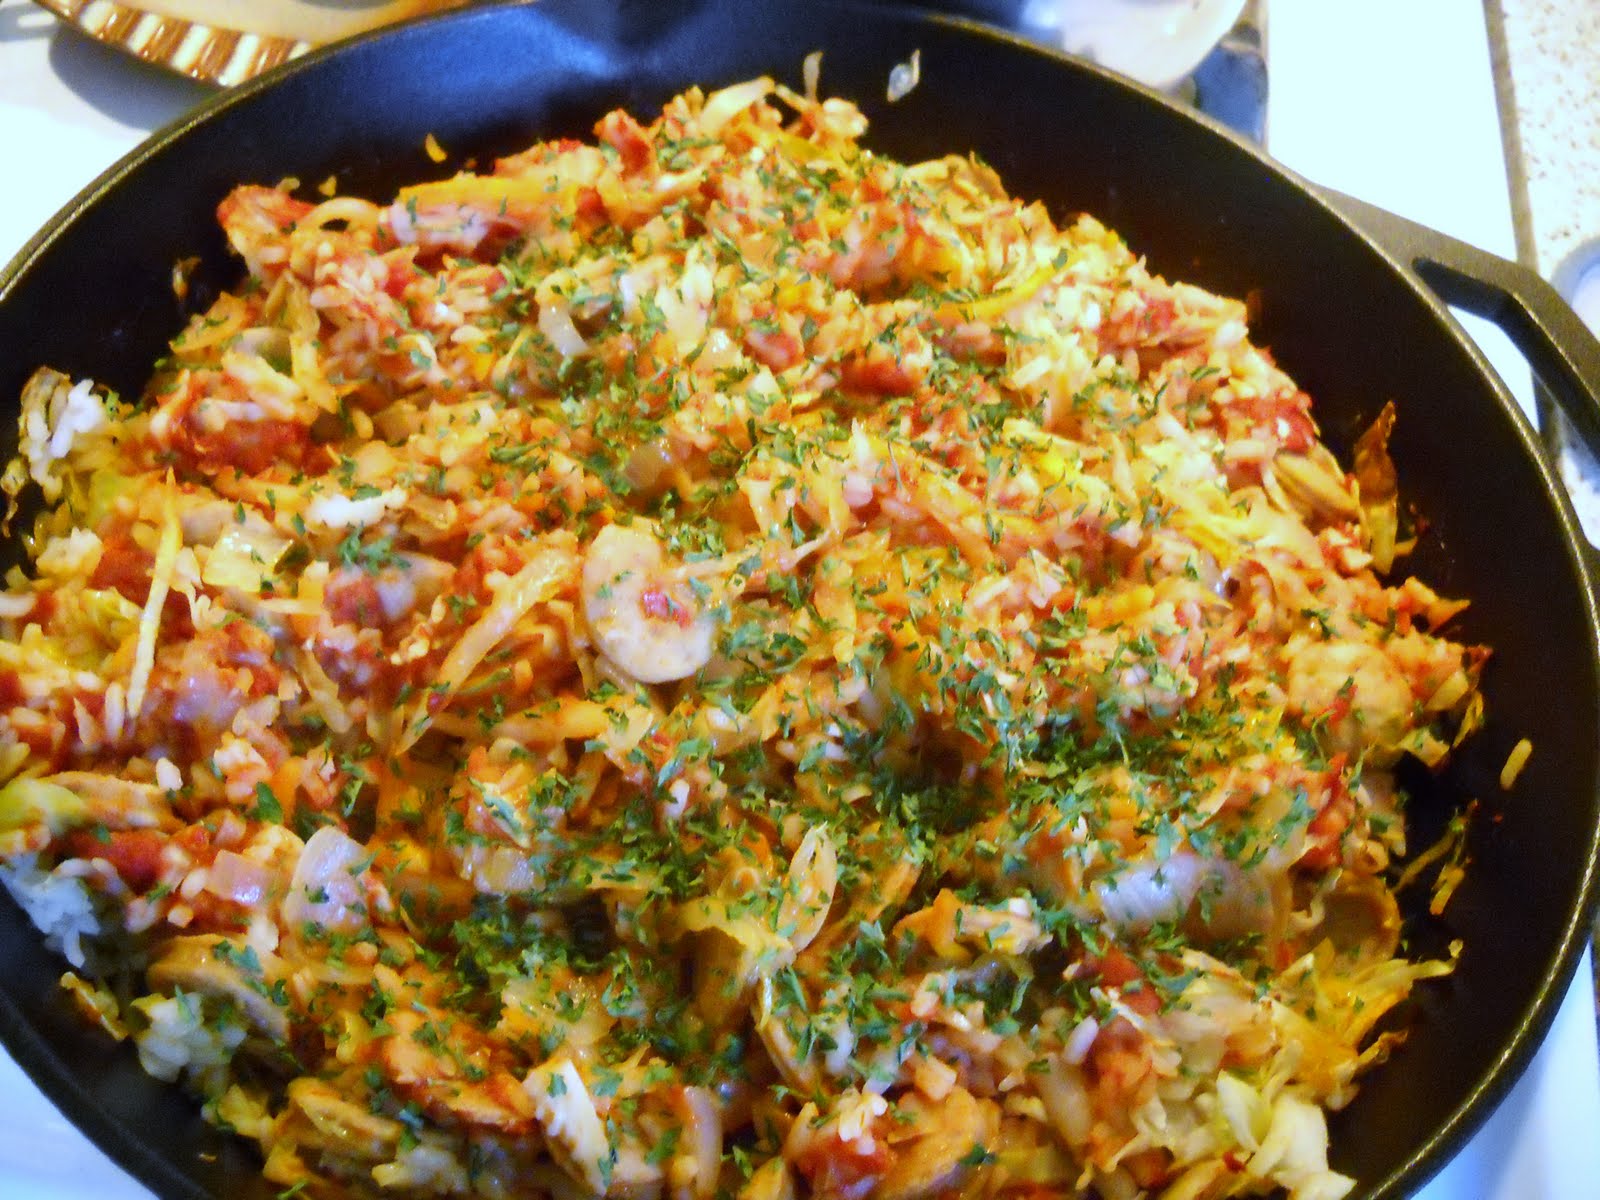
I say this serves 3 1/2 because we ate it up and just had a little left over!
Sunday, July 31, 2011
Off the Handle: A.T.O. Salad
Not long ago we had some old friends at our house for dinner. Seeing nice avocados in the supermarket that day, I was driven to get some. That night I served this recipe with salad greens mixed in, and everyone ate it up.
Last night I made this for my parents without the lettuce. It was a simple addition to a simple gluten free pizza dinner. Lo and behold, everyone enjoyed it - including my Dad, who had seconds! (Who would guess?)

A.T.O. Salad (Avocado, Tomato & Onion)
(Serves 4-6)
Mix in a bowl:
2 cups of grape tomatoes, halved lengthwise,
2 avocados (insides only, no pit), chopped, and
1/2 of a red onion, chopped.
In a small bowl, combine for your dressing:
2 Tbs olive oil,
1 Tbs lemon juice, and
1/2 tsp salt.
Pour the dressing over the vegetables and toss gently.
Add a little fresh or dried cilantro.
It does fine waiting in the fridge for up to a day if necessary.
Optional additions:
lettuce torn into small pieces
chunks of cheese
* * * * *
For dessert, I made another fruit upside-down skillet cake (see entry of June 4, 2011), except this one was with peaches and cherries instead of apples. I skipped the nutmeg and cloves, using only cinnamon in the cake mixture.
Another hit!!

Friday, July 22, 2011
Off the Handle: Cake Mix Cookies

Hubby actually moved his hot rod today!
He took it out of the garage and turned it around.
A big step to road-readiness!
Congrats, Peter! :)
Last weekend I made cookies from a Betty Crocker gluten free cake mix.
The recipe is found here.
It is super easy.
I used vanilla cake mix instead of chocolate. I added about 1/2 cup of chocolate chips and 1/2 cup of slivered almonds. As always, I used parchment paper to bake them on. My technique made two dozen cookies instead of the four listed on the recipe....I guess I made them "big." I baked them for 12 minutes.
They were very tasty, but next time I will add more chocolate chips.
They didn't brown, however, so I can see why the original recipe is with the devil's food cake mix. Regardless, it was a quick and easy way to make a GF treat!

Friday, July 15, 2011
Layered Mexican Chicken Casserole
Yesterday was such a beautiful day.....I decided to take John on a little "surprise adventure" to our local town green. We played Frisbee, wandered around the old cemetery there, and then sat looking up at the sky and taking photos. We had a lot of fun. Here are some pictures of our town green:
![]()
![]()
![]()


On Tuesday night Peter was on a business trip in San Antonio. On a whim, John and I whipped up a Mexican-themed casserole. We put on a CD of Mexican music and had a nice dinner together. In a way, I felt closer to hubby who was probably consuming something similar, but in another way it just made me sad that he was not home. He was home the following evening, however.....and we had plenty of leftovers! We had previously decided tht if the leftovers were tasty, we would post it on the blog. Obviously, we enjoyed them a lot!
Layered Mexican Chicken Casserole
(Serves 6-8.)
Preheat the oven to 350.
In a bowl, combine:
one 18-oz can of Progresso gluten free cream of mushroom soup,
one 14.5-oz can diced tomatoes,
one red or green bell pepper, chopped, (I used red)
one small onion, chopped, and
1/2 Tbs chili powder.
(Next time, however, I think I will increase the chili powder to a full Tbs.)
Take one 12-oz package of Food For Life rice tortillas (John can't have corn), and slice all six tortillas into strips.
Have two 9-oz packages of Purdue short cuts.
Have one 8-oz package of shredded cheddar or Mexican cheese blend.
Spray a 9 X 13 glass pan with cooking spray.
Sprinkle about 1/3 of the tortilla strips on the bottom of the pan.
Top with half of the chicken,
then half of the soup mixture,
followed by half of the cheese.
Repeat with the second 1/3 of the tortilla strips,
The rest of the chicken,
then the rest of the soup mixture, and
the rest of the cheese.
Top with the last bits of tortilla strips.
Bake 45 minutes, uncovered.
Let it sit 10 minutes after taking it out of the oven.
Leftovers microwave well!

Thursday, July 7, 2011
Off the Handle: Dessert Pizza
While visiting Old Sturbridge Village on July 4th, we watched as the sheep were moved from one place to another. They ran across the common for this. Hubby quickly dubbed this, "The Running of the Sheep," as if it was Old Sturbridge Village's version of the running of the bulls in Pamplona, Spain.

We thought that was pretty funny!
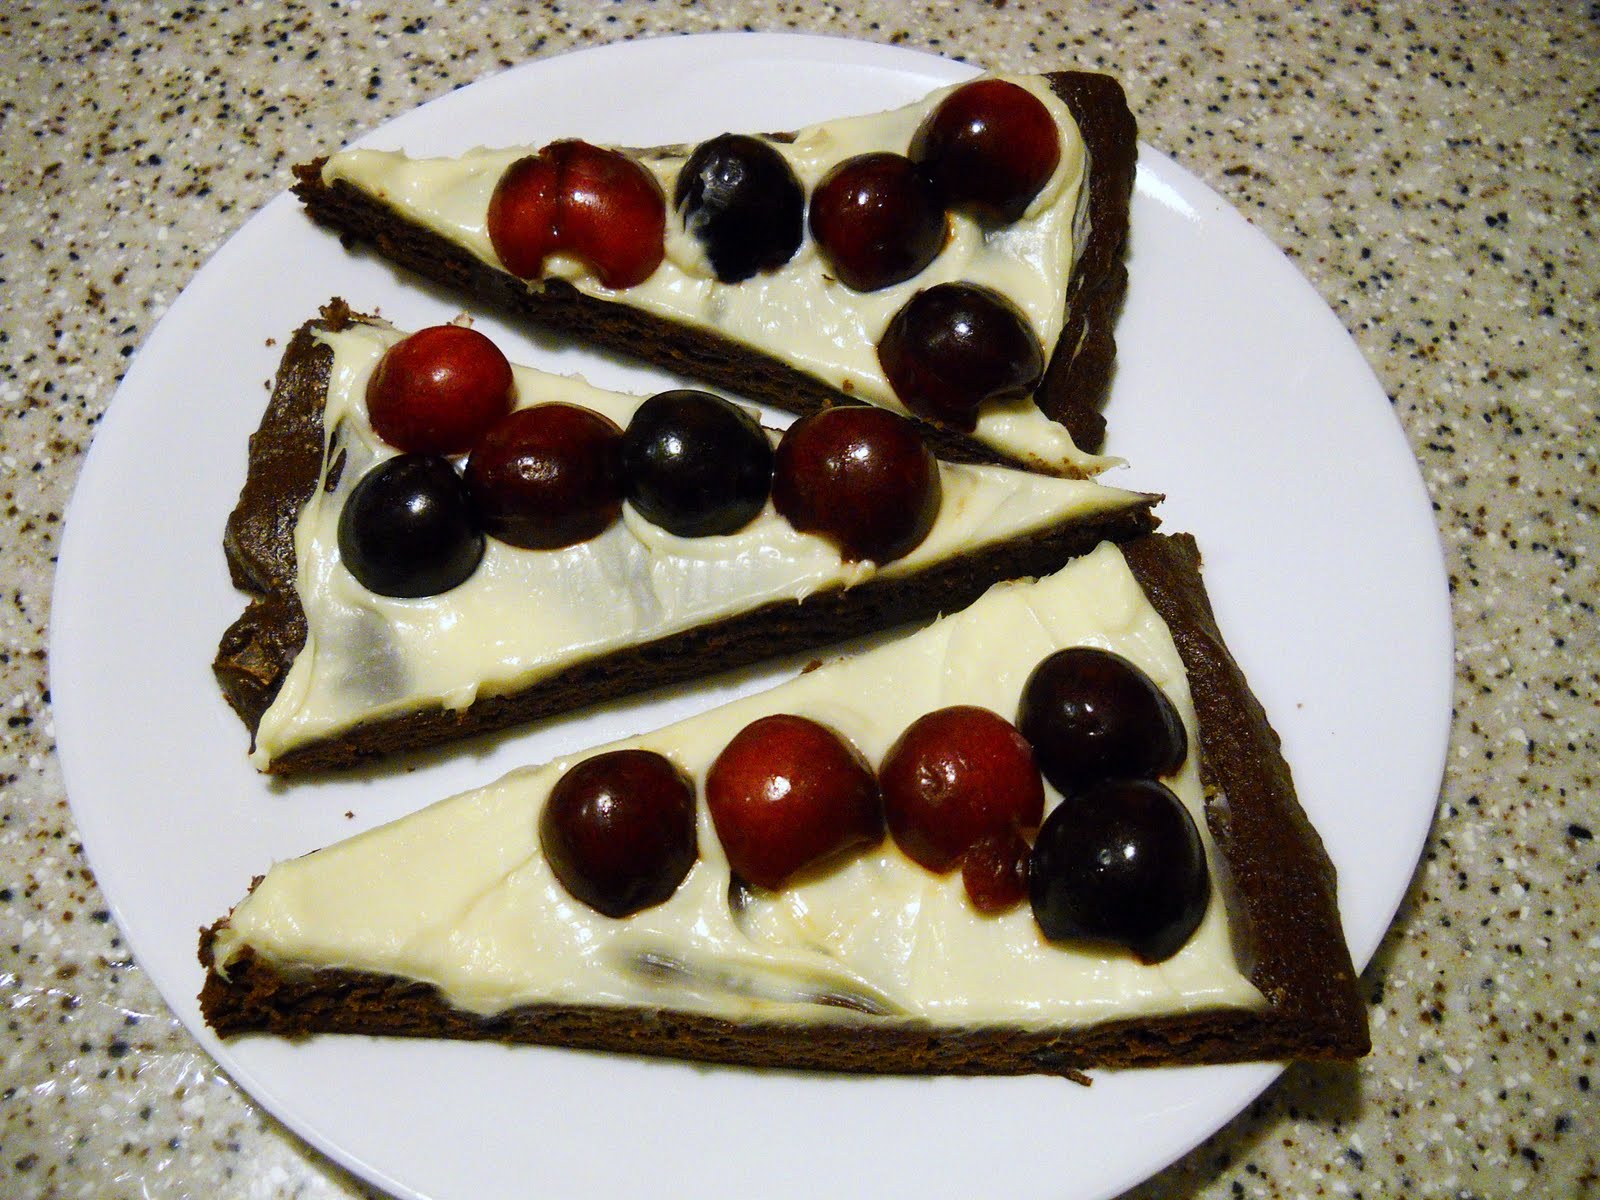
The night before we had nine people at the house for dinner, and two more joined us for dessert time. I was inspired by this recipe from glutenfreely.com. (That's a link you can click on to see, by the way....)
I didn't have Betty Crocker Brownie Mix, although I think it is very good. I used one 16-oz package of Pamela's Chocolate Brownie Mix instead, prepared roughly according to package directions. (I always take steps to reduce the fat somewhat if possible, so I used 1/4 cup of oil and 4 oz. of pureed fruit instead of 1/2 cup of oil and the water it called for....) I spread this onto a pizza pan, previously sprayed with cooking spray. I smoothed it out nicely into a 12" circle with wet fingers.
I baked this brownie crust at 350 for about 19 minutes. I let it cool completely in the pizza pan.
I mixed one 8-oz package of Neufchâtel cheese (the "light" cream cheese) with the 1/3 cup of sugar and some vanilla. I put this aside in the refrigerator. I also pitted and sliced in half exactly 30 cherries, enough for five cherry halves per pizza slice. I wanted red on top due to Independence Day weekend. I think most any fruit would be good on this, however.
Just before serving, I spread the cheese mixture on the brownie crust, cut it into 12 slices, and decorated each slice with the fruit. It looked really nice and tasted great.
Monday, July 4, 2011
Off the Handle: More Pizzelle
Happy Independence Day!
We were at Old Sturbridge Village today, and they had two new calves at the Freeman Farm. One was pretty frisky, and it apparently wanted to get the other to play. Here is its picture:

For the two weekend gatherings that we hosted, I decided to make pizzelle again. I looked over my boxes of gluten free cake mixes and decided to use a 15-oz package of Betty Crocker Gluten Free yellow cake mix for a version of my cake mix pizzelle recipe of April 23, 2011. Here's what I did:
I heated up my dedicated gluten free pizzelle baker.
I melted 1/2 cup (1 stick) of butter in the microwave for 30 seconds.
I used a wire whisk to smooth out the melted butter.
I added 3 eggs,
about 1 tsp of vanilla, and
about 1/2 tsp of anise extract, and
the cake mix.
I didn't need to add any water as the dough was not as thick as I am accustomed to for pizzelle.
I baked each pair of pizzelle for 33 seconds (using a digital timer) with about 1 Tbs glops of dough, possibly less. This recipe makes 32-36 pizzelle.
The pizzelle came out a little thinner than usual. John liked them the best of all my pizzelle!
I dust them with powdered sugar before serving.
Always yummy! No gluten necessary for good pizzelle....

Tuesday, June 28, 2011
Getting a Handle On: GF Pizza :)
At this point I have had a good amount of experience making gluten free pizza. I hate to disappoint the reader by saying that I use a mix, but it's the truth. It works.....'nuff said.
We tried a few brands and like the King Arthur Pizza Crust Mix the best:
![]()
![]()
![]()
![]()
We tried a few brands and like the King Arthur Pizza Crust Mix the best:

I pretty much follow the directions on the box, with these exceptions:
In Step 1, I use 2 Tbs oil plus 2 Tbs additional water instead of 4 Tbs of oil.
Aso in Step 1, it's nice when I remember to add some Italian herbs.
In Step 4, I use cooking spray on the baking sheet/pizza pan. I form a little more than half of the dough onto a standard 16" round pizza pan, plus a second on a baking sheet. The dimensions on that one aren't crucial, but I guess it is about 12-14" in diameter.
Regarding pans: My pizza pans for glutenous pizzas have holes, but I would never try those for GF pizza. The GF dough is very soft.....which leads me to my other important tip....
It's very important to use WET FINGERS to smooth the crust on the pizza pan or other baking sheet. I keep my 2-cup measuring cup nearby, with warm tap water inside, to frequently dip my fingers. (Gluten free dough is nothing like glutenous dough!!!)
After smoothing the crusts with wet fingers, I spray them briefly with cooking spray, then just let them rise uncovered.

I bake the crusts for 10 minutes or so at 400 degrees in Step 5, then remove from the oven as directed and top in this way: One pizza, usually the smaller one, gets a few dollops of jarred tomato pasta sauce, about half of an 8-oz bag of shredded mozzarella, and a sprinkling of parmesan. The second pizza, usually the larger one, becomes the "white" pizza, which is nice because it seems to keep a tad better for leftovers. Everyone loves the garlicky flavor. Here's what I do.....
I pour a dollop of olive oil on the crust, smoothing it with the back of a spoon, then sprinkle it with garlic powder and Italian herbs. On top of that, I sprinkle the other half of the shredded mozzarella, and the parmesan.
I find that the parmesan really helps to give my pizzas a "pizza flavor!"
Usually I pop them into the oven for the second baking at 8 minutes,
Here's how they look:

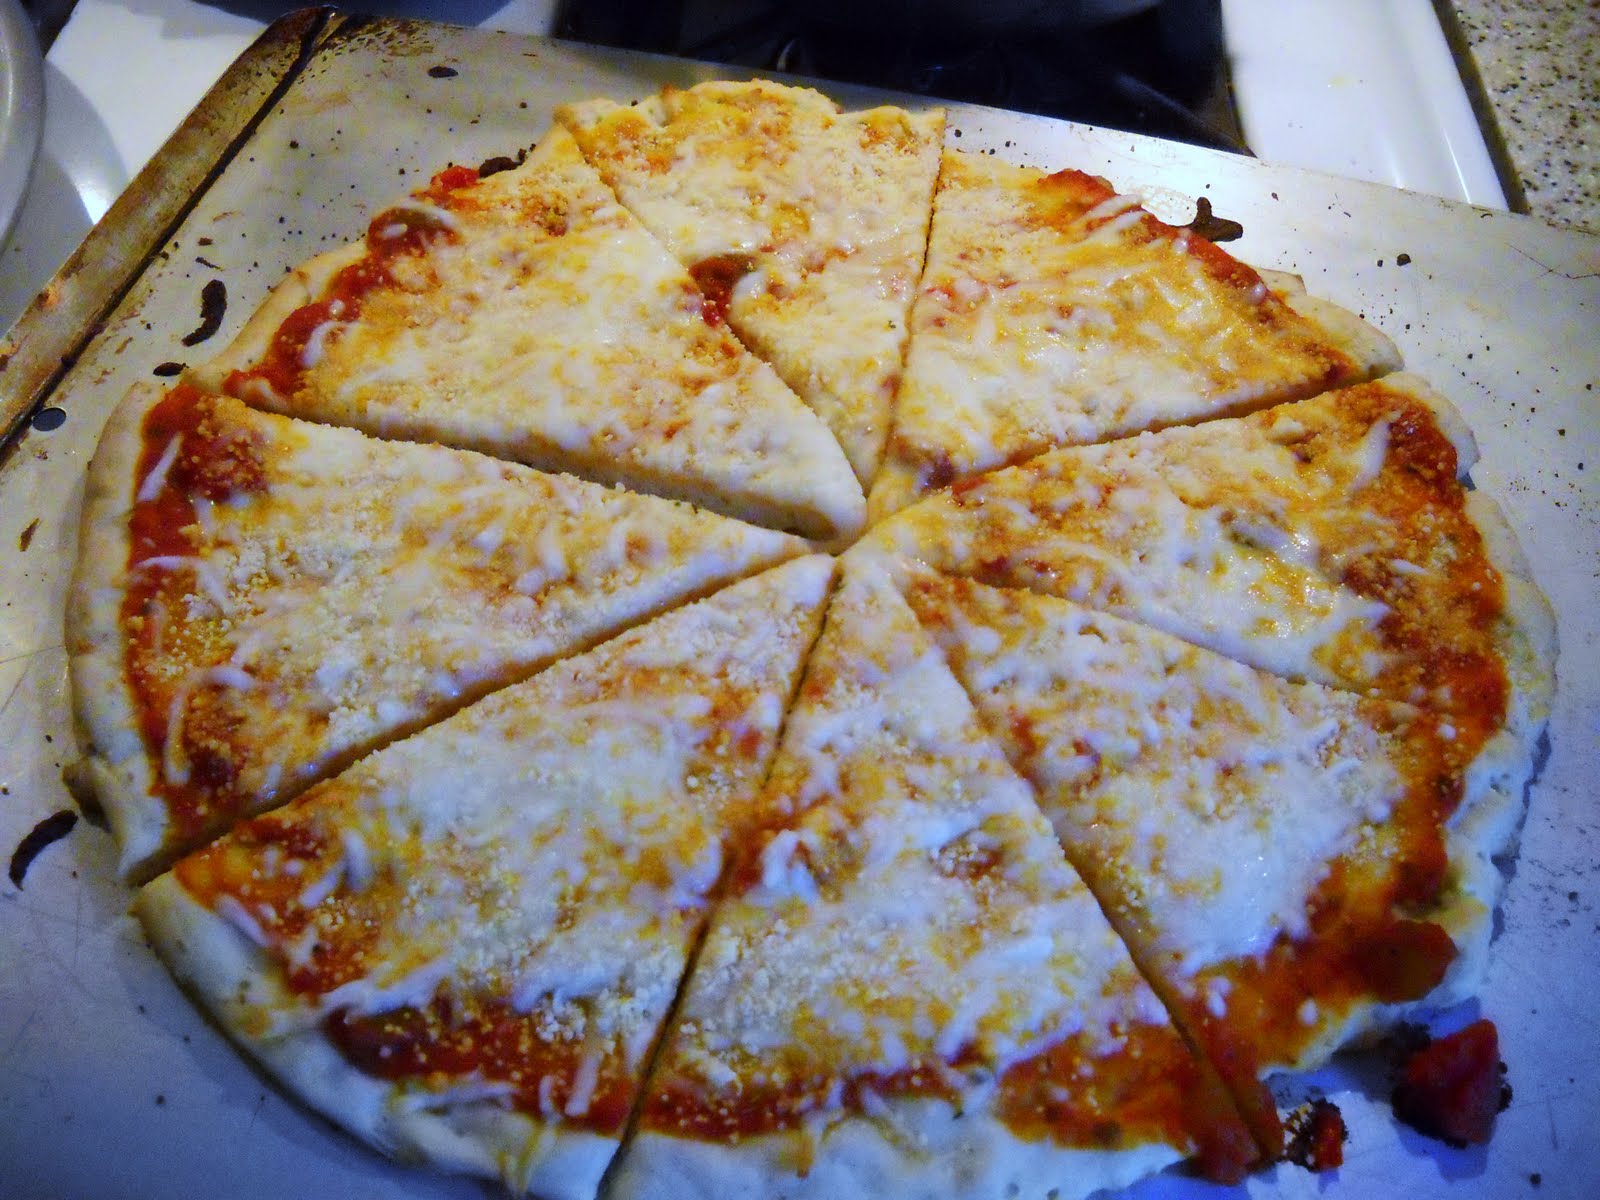
This is actually enough for five of us, with three of us being light eaters (meaning about two slices each).....plus leftovers for John the next day.
Saturday, June 25, 2011
Off the Handle: Italian Almond Cookies

You know those great platters of Italian cookies that people buy for parties? I usually dig down and take only the almond macaroon style....they have the most amazing almond flavor, and a melt-in-your-mouth texture. Sometimes they are rolled in pignoli nuts, sometimes they are topped with a whole almond. However they are dressed, I find them!
If you need to be gluten free, those platters are off-limits due to the risk of contamination. It's from a standard bakery, after all.... you have to guess they probably make them with floured hands, even if there is no flour in the recipe. They are also piled onto a tray with all the other cookies....
Enter The Hot Handle to ensure the ability of gluten free individuals (a.k.a. my DS) to partake in this delicious treat. I also discovered they are EASY. YaY!
Recipe should easily double if you'd like!
Italian Almond Cookies
Preheat the oven to 350.
Open an 8-oz can of almond paste and put that in the food processor.
Add 1/2 cup of sugar.
Combine until crumbly in texture.
Add 1 egg white and 1/2 to 1 tsp of vanilla.
Process again until smooth.
It will be kind of sticky and wet.
Spoon this mixture into 16 lumps onto a cookie sheet lined with parchment paper.
Using wet fingers, smooth these lumps into nice round lumps.
Decorate with 3-4 slivered almonds on each lump.
Bake 20 minutes, until golden brown.
Let cool on parchment paper.
Remove from parchment. Hide them until serving time.

Tuesday, June 21, 2011
Amazing Flourless Chocolate Cake
For Father's Day, I made an amazing flourless chocolate cake that is actually fairly healthy. What a find! The "surprise ingredient" would have astounded family members if I had told them about it. Everyone enjoyed it.
I stumbled upon this recipe on allrecipes.com:
http://allrecipes.com/recipe/garbanzo-bean-chocolate-cake-gluten-free/detail.aspx
Of course, I made changes. In direction #1 it says to "grease and flour a 9-inch cake pan." Well, only use flour if it's the gluten free variety. I didn't bother; I just used cooking spray. I used an 8-inch glass pan instead of a 9-inch pan. It worked out fine.
I didn't invert the cake onto a cake pan. Instead, I just let it cool in the pan. When it was cool, I sprinkled it with confectioners' sugar and toted it over to my brother's Father's Day cookout.
The first piece out of the pan crumbled apart.....so I took that one. :)
The texture of the slices at that time was somewhat cake-like, but not dry.
I served them with low-fat vanilla ice cream on the side.
The next day, after a night in the refrigerator, the one remaining slice was happily consumed by John. He reported that it was more like fudge by then.
He appeared to like them both.
Two possible textures....in one delicious cake!
I can't believe I forgot to take a photo!
I will DEFINITELY make this cake again!
Saturday, June 18, 2011
Egyptian Walking Onions

These are "Egyptian Walking Onions." We learned about them at Old Sturbridge Village. They have an onion flavor, and the entire plant is edible.
The reason they are called "Walking Onions" is that the bulbs at the end of the stalks eventually get heavy, and the stalk bends over as the bulb touches the ground. At this point, a new plant will grow. They can walk right across your garden that way!
Yesterday I made pesto (see post of 7-10-2010), as you might guess from the cropped basil in the background of the photo. I also had a few leftover bell peppers. As a side dish, I decided to cook up the peppers in my 8" cast iron skillet with some olive oil. I added two stalks of the Egyptian Walking Onions, cut like scallions. I also added a spoonful of that all-purpose "Wow" seasoning that we like. In the photo below, you can see that the fork is pointing at one of the cut-up walking onion stalk bits.

The "Notta Pasta" rice fettuccini is a good pairing with the pesto. Once it was cooked, I was careful to rinse it with hot water that I heated on the stove as I cooked the pasta. Too much mixing doesn't work here (it gets gummy!) ..... so I gently mixed my pesto without the cheese into the pasta, and we generously added parmesan on top, at our individual plates.

After this dinner, John was meeting friends at a restaurant where he did not feel comfortable about it being gluten free....it was an Italian restaurant with lots of opportunity for cross-contamination. He went ahead to meet his friends, simple joining them with a beverage, feeling comfortably full from our home-cooked meal.
Saturday, June 4, 2011
Apple Skillet Cake
Yesterday was my birthday. I needed a cake to tote over to my parents' house in the evening.
Not long ago, I purchased this book, "The Cake Mix Doctor Bakes Gluten-Free" by Anne Byrn. I have some of her previous books, which I don't anticipate using much any more since all the recipes contain gluten. I was very excited to see this one!

On page 167 is her "Fresh Apple and Pear Skillet Cake." I used this cake mix by Cherrybrook Kitchen:

I made modifications, of course. Instead of 6 Tbs of butter, I used 4 Tbs of butter plus 2 Tbs of canola oil. I used strictly butter in the apple mixture which comes out on top after you flip it over onto a plate, and the leftover two plus two of oil in the cake mix. I also used two apples instead of an apple and a pear. I omitted the instant pudding mix, and added about 1/4 tsp of nutmeg. (Of course ... Connecticut is "The Nutmeg State!)
Here's how it looked when it came out of the oven.

At that time, I looked at the directions, which I should have done more carefully to begin with, and it said,
"Serve the cake warm."
Impossible. I wasn't heading to my parents' house for another four hours!
I waited the five minutes, ran a knife around the edge of my 10-inch cast iron skillet, and flipped it over onto a cake plate. The plate had one of those dome-like covers. That worked out well to store it after it had cooled.
Being cooled, the cake was FINE. It tasted delicious with a dollop of whipped cream! My parents liked it with a spoonful of vanilla frozen yogurt on the side.
In any case, it was an excellent birthday dessert. I would like to try this with other fruits!

Subscribe to:
Posts (Atom)