The Hot Handle

A blog interspersed with occasional gluten free recipes.

Please note: If you have a family member who requires a gluten free diet, be sure to use a cast iron skillet that has never previously touched gluten....and if it has, scrub it all down completely and re-season, to be on the safe side.

Looking for information on Celiac Disease? There are many good sites, but here is one to get started with:
www.celiacdisease.net/celiac-disease-101.


Showing posts with label Main Dish. Show all posts

Saturday, September 8, 2012

Travel Trailer dining with style!


The Hot Handle family has had a very busy spring and summer, as evidenced by the lack of posts from that time.  The summer culminated in a two week road trip from New England to Albuquerque and back, to bring our son to grad school at UNM.  We had already been thinking of purchasing a small travel trailer, and the idea of this trip got us to actually do it.  It's only 18 feet, but very comfortable inside.  It has a small propane stove which was perfect for quick skillet dinners.

We picked up local foods and used an all-purpose lid with my 10" cast iron skillet.  We carted along our own olive oil and an all-purpose mesquite spice mix.  It turned out to be a little spicier than I expected, but no one complained. 

The basic recipe (no measuring!) goes like this:  Heat up a glop (probably two tablespoons) of olive oil.  Add about 3/4 pound of meat and an onion.  Cook and stir it up a bit.  Add vegetables.  Add a little of your spice mix, until it "looks right" to you.  Cover pan and let it steam until it's all cooked through.  Uncover and cook until any excess liquids have evaporated, if necessary.  Serve.  Sprinkle with parmesan, if desired.   

I had a rule:  no leftovers were allowed.  This proved to be no problem.


In Virginia, our dinner consisted of chicken tenders, an onion, a green pepper, and snow peas.

In Tennessee, we had beef, onion, potatoes, and sugar peas.

In Arkansas, we whipped up smoked pork with onion, potato, and black-eyed peas.  (This is what the guys are enjoying in the above photo!)

In Oklahoma, we stirred together kielbasa, onion, potato, and cabbage (just a pre-shredded package of cole slaw mix). 


Once in Albuquerque, we dined three nights at a wonderful Italian restaurant that serves excellent gluten free food:  Paisano's.  I can't thank this place enough.  It was awesome. 


Now home, we are continuing the travel trailer skillet dinners, since they were so delicious.  Below is a photo of one I recently made, with chicken sausage, onion, potato and a package of frozen chopped spinach. 


If you want to find out more about our travels and life at UNM in Albuquerque, please check out John's blog:  http://hdhijinks.blogspot.com/

Oh, one last thing to tell you:  we stopped - twice - at a Lodge Logic factory outlet along route 40 in Tennessee.  Couldn't resist.  I splurged and got myself the clear tempered glass lids for the 10 and 12-inch skillets.  Hey, how often am I in Tennessee?

Happy cooking!


Sunday, February 5, 2012

Stuffed Cabbage Soup


I absolutely love using my crock pot/slow cooker.  What a marvelous invention!  Throw foods together, turn it on, and come home later to a meal all ready.  If you're able to set the table ahead of time, that's even better.

I was surprised that I have not posted this recipe earlier.  It's one of my favorites.

To make it:

Brown 1-1/4 pounds of ground beef in your skillet.

Mix it in the crock pot/slow cooker along with:

14 oz. of cole slaw mix,
28 oz. canned crushed tomatoes,
1 onion, chopped,
32 oz. gluten free beef broth,
1/4 cup brown sugar,
1 Tbs lemon juice,
1/4 cup of rice, and
1/2 tsp salt.

Cook about 8 hours on low. 
I usually start my slow cooker on high for about two hours at noon,
then I turn it down to low from 2-6 pm.  Dinner is usually around six.

Saturday, August 27, 2011

Fresh Tomato Sauce


Last night we had a bunch of fresh tomatoes which were given to us.  I was out having coffee with a friend, went home and decided that I needed to use all of them.  How should I do that with the limited time I had?

Well, first off I let hubby know dinner might not be quite ready when he got home!

Somehow I got a pasta dinner together in about 1 1/2 hours.  It's a fair amount of work, but the result was great!

Fresh Tomato Sauce with Basil

1.  Fill a 2-qt saucepan about 2/3 full with water and heat it to boil. 

2.  Put a 4-qt saucepan on the stove with 2 Tbs of olive oil.  Add one onion, chopped.  Let it cook a few minutes while you proceed to the next step.

3.  Wash ~4 lbs of tomatoes.  Drop them into the boiling water 2 at a time.  When the skins have blistered, pull them out with a slotted spoon.  Put them into cold water until cool enough to handle, then remove the skins.  Cut tomatoes in half and remove green/hard parts.  Poke your fingers through them and let all the seeds slide out into a trash receptacle.  Hold what is left over the 4-qt saucepan, and squish them into the pan to join their onion and oil counterparts.  Keep doing this until your tomatoes are all in the pan.  Yes, this is messy but if you do it with a CD of Andrea Bocelli singing in the background you will feel creative and romantic.

4.  Add 1 tsp salt, 1 tsp sugar, and black pepper to taste.

5.  Get yourself some fresh basil, a nice bunch of it.  Rinse it off and shake it dry.  Grab some clean kitchen shears and trim off irregular pieces of basil leaves.  Drop these into the 4-qt pan as you cut. 

6.  Let the whole thing simmer on medium-low for about an hour, uncovered.

7.  Meanwhile, heat up some water in yet another pan to cook up some gluten free pasta.

8.  As your pasta is cooking, decide it you want to eat your sauce chunky, as we did, or if you want it thicker.  I figured if I wanted it thicker I could have put in some tomato paste, but we decided to leave it alone.  Also, if we didn't want the watery broth, I could have pureed the whole thing in the pan by using my hand blender.  We didn't do this, either.

9.  Toss pasta with some of the sauce.  Serve with extra sauce and parmesan.  Consume with pride. 

10.  Smile!


Wednesday, August 3, 2011

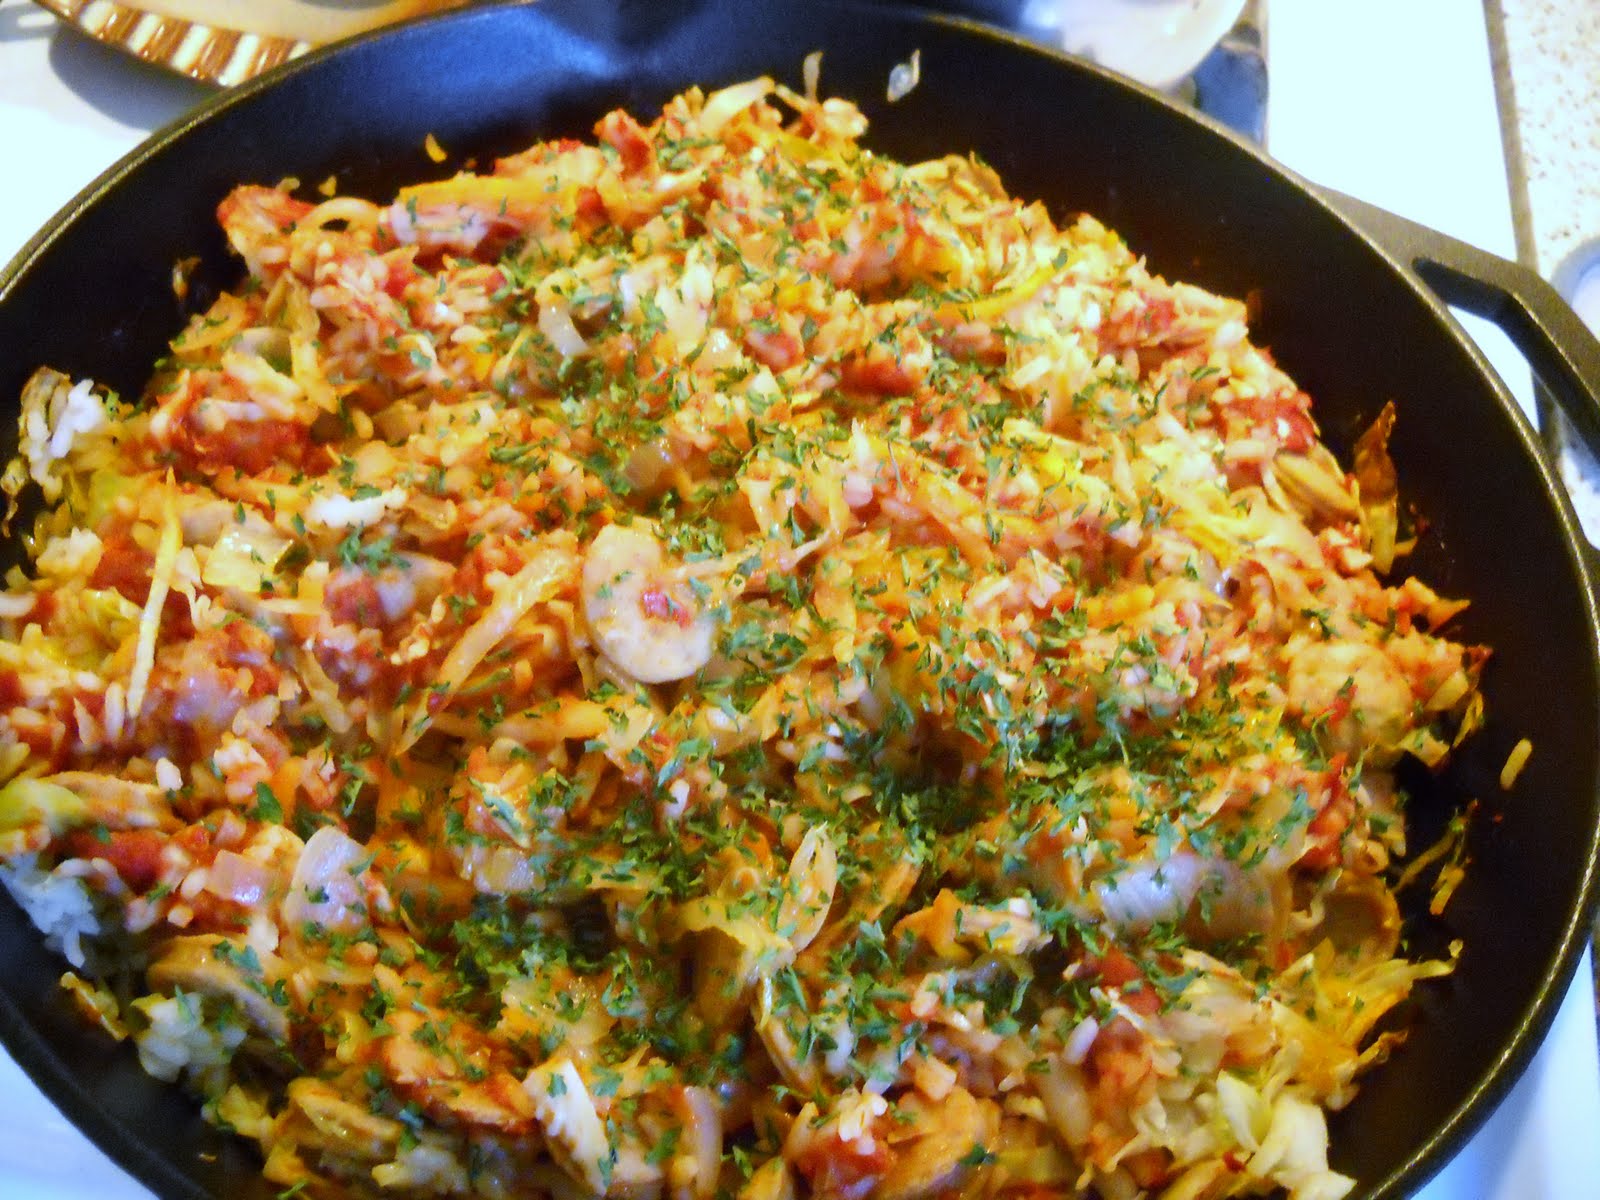
Sausage and Cabbage Medley

We went for a walk the other day and saw three red tailed hawks, but I didn't have my camera on me.  The following day we saw one in a tree.  I took this photo.


The day after that we didn't see any at all.  I'll keep looking!

I had a bag of cole slaw in the refrigerator and decided to use it in a cooked dish.  I came up with this one!


Sausage and Cabbage Medley
(Serves 3 1/2)

Start cooking 1/2 cup of dry rice to make two cups of cooked rice.
Preheat the oven to 350.

Take one 12-oz package of cooked chicken sausage
Slice it thinly, and place it in 12-inch cast iron skillet. 
Heat it a little on the stove to get it going. 

Add one onion, chopped.

Layer on one 14-oz bag of cole slaw mix (from the produce section)
and the cooked rice.

Mix in a bowl:

15-16 oz canned tomato sauce,
1 Tbs brown sugar,
1 Tbs lemon juice, and
1 Tbs Worcestershire sauce.

Pour this over the cole slaw mixture in the skillet.
Cover loosely with foil.

Bake 40 min,
uncover, and
bake 20 minutes more.

Stir the mixture before serving, and
sprinkle it all with parsley.

Serve with parmesan and freshly ground pepper!


I say this serves 3 1/2 because we ate it up and just had a little left over!


Friday, July 15, 2011

Layered Mexican Chicken Casserole

Yesterday was such a beautiful day.....I decided to take John on a little "surprise adventure" to our local town green.  We played Frisbee, wandered around the old cemetery there, and then sat looking up at the sky and taking photos.  We had a lot of fun.  Here are some pictures of our town green:


On Tuesday night Peter was on a business trip in San Antonio.  On a whim, John and I whipped up a Mexican-themed casserole.  We put on a CD of Mexican music and had a nice dinner together.  In a way, I felt closer to hubby who was probably consuming something similar, but in another way it just made me sad that he was not home.  He was home the following evening, however.....and we had plenty of leftovers!  We had previously decided tht if the leftovers were tasty, we would post it on the blog.  Obviously, we enjoyed them a lot!

Layered Mexican Chicken Casserole
(Serves 6-8.)

Preheat the oven to 350.

In a bowl, combine:

one 18-oz can of Progresso gluten free cream of mushroom soup,
one 14.5-oz can diced tomatoes,
one red or green bell pepper, chopped,  (I used red)
one small onion, chopped, and
1/2 Tbs chili powder

(Next time, however, I think I will increase the chili powder to a full Tbs.)

Take one 12-oz package of Food For Life rice tortillas (John can't have corn), and slice all six tortillas into strips.

Have two 9-oz packages of Purdue short cuts.
Have one 8-oz package of shredded cheddar or Mexican cheese blend

Spray a 9 X 13 glass pan with cooking spray.

Sprinkle about 1/3 of the tortilla strips on the bottom of the pan.
Top with half of the chicken,
then half of the soup mixture,
followed by half of the cheese.
Repeat with the second 1/3 of the tortilla strips,
The rest of the chicken,
then the rest of the soup mixture, and
the rest of the cheese.
Top with the last bits of tortilla strips.

Bake 45 minutes, uncovered.
Let it sit 10 minutes after taking it out of the oven.

Leftovers microwave well!


Tuesday, June 28, 2011

Getting a Handle On: GF Pizza :)

At this point I have had a good amount of experience making gluten free pizza.  I hate to disappoint the reader by saying that I use a mix, but it's the truth.  It works.....'nuff said.

We tried a few brands and like the King Arthur Pizza Crust Mix the best:


I pretty much follow the directions on the box, with these exceptions:


In Step 1, I use 2 Tbs oil plus 2 Tbs additional water instead of 4 Tbs of oil.

Aso in Step 1, it's nice when I remember to add some Italian herbs.


In Step 4, I use cooking spray on the baking sheet/pizza pan.  I form a little more than half of the dough onto a standard 16" round pizza pan, plus a second on a baking sheet.  The dimensions on that one aren't crucial, but I guess it is about 12-14" in diameter.

Regarding pans:  My pizza pans for glutenous pizzas have holes, but I would never try those for GF pizza.  The GF dough is very soft.....which leads me to my other important tip....

It's very important to use WET FINGERS to smooth the crust on the pizza pan or other baking sheet.  I keep my 2-cup measuring cup nearby, with warm tap water inside, to frequently dip my fingers.  (Gluten free dough is nothing like glutenous dough!!!) 


After smoothing the crusts with wet fingers, I spray them briefly with cooking spray, then just let them rise uncovered.


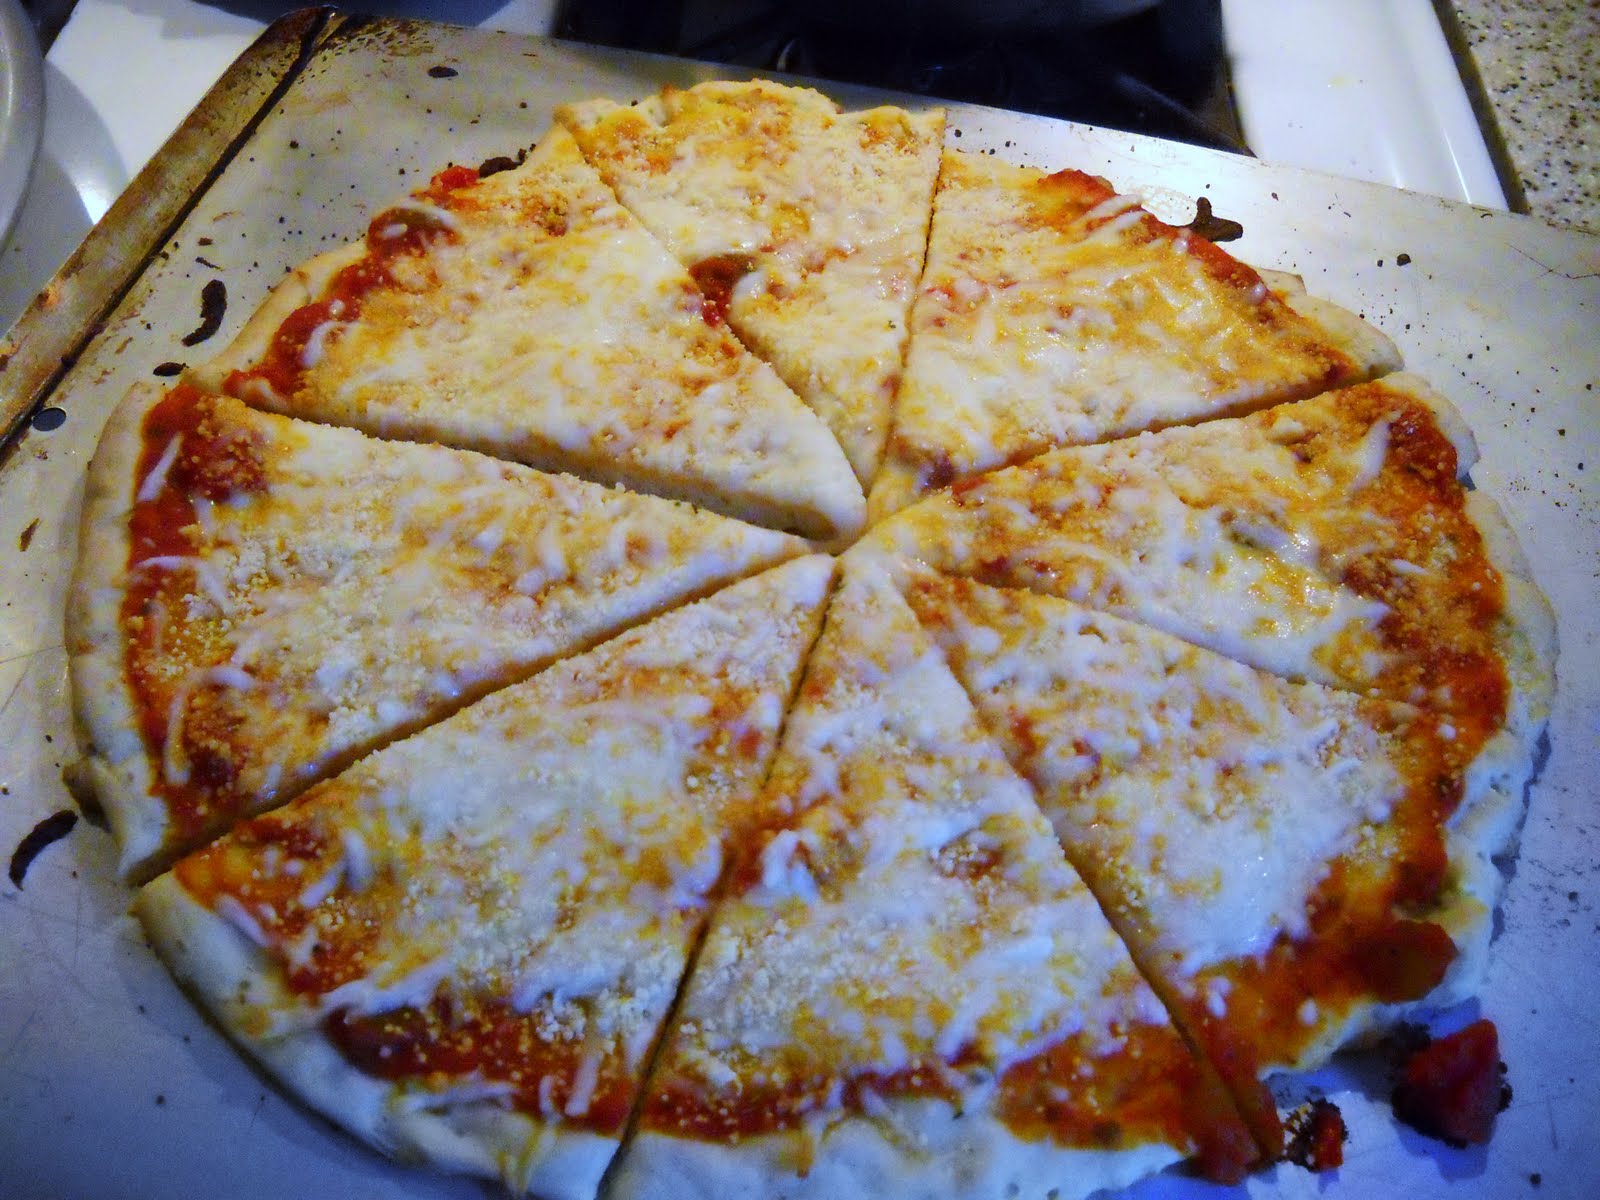
I bake the crusts for 10 minutes or so at 400 degrees in Step 5, then remove from the oven as directed and top in this way:  One pizza, usually the smaller one, gets a few dollops of jarred tomato pasta sauce, about half of an 8-oz bag of shredded mozzarella, and a sprinkling of parmesan.  The second pizza, usually the larger one, becomes the "white" pizza, which is nice because it seems to keep a tad better for leftovers.  Everyone loves the garlicky flavor.  Here's what I do.....

I pour a dollop of olive oil on the crust, smoothing it with the back of a spoon, then sprinkle it with garlic powder and Italian herbs.  On top of that, I sprinkle the other half of the shredded mozzarella, and the parmesan. 

I find that the parmesan really helps to give my pizzas a "pizza flavor!" 

Usually I pop them into the oven for the second baking at 8 minutes, 

Here's how they look:


This is actually enough for five of us, with three of us being light eaters (meaning about two slices each).....plus leftovers for John the next day.


Saturday, June 18, 2011

Egyptian Walking Onions


These are "Egyptian Walking Onions."  We learned about them at Old Sturbridge Village.  They have an onion flavor, and the entire plant is edible.

The reason they are called "Walking Onions" is that the bulbs at the end of the stalks eventually get heavy, and the stalk bends over as the bulb touches the ground.  At this point, a new plant will grow.  They can walk right across your garden that way!

Yesterday I made pesto (see post of 7-10-2010), as you might guess from the cropped basil in the background of the photo.  I also had a few leftover bell peppers.  As a side dish, I decided to cook up the peppers in my 8" cast iron skillet with some olive oil.  I added two stalks of the Egyptian Walking Onions, cut like scallions.  I also added a spoonful of that all-purpose "Wow" seasoning that we like.  In the photo below, you can see that the fork is pointing at one of the cut-up walking onion stalk bits.


The "Notta Pasta" rice fettuccini is a good pairing with the pesto.  Once it was cooked, I was careful to rinse it with hot water that I heated on the stove as I cooked the pasta.  Too much mixing doesn't work here (it gets gummy!) ..... so I gently mixed my pesto without the cheese into the pasta, and we generously added parmesan on top, at our individual plates.


After this dinner, John was meeting friends at a restaurant where he did not feel comfortable about it being gluten free....it was an Italian restaurant with lots of opportunity for cross-contamination.  He went ahead to meet his friends, simple joining them with a beverage, feeling comfortably full from our home-cooked meal. 

Friday, March 25, 2011

Getting a Handle On: Greens & Beans


This is another view of that awesome full moon last weekend.  It was hard to take a decent picture with my little camera....but this one looks a bit like Saturn.

I have been cooking up those greens.  Usually it's by heating up a little olive oil, or even a flavored olive oil, in the bottom of my 12" skillet.  I might then add some onion and/or pepper, chopped.  I then add the greens, usually broccoli rabe, chopped.  I let it sit until it's wilted.  Then I add a can of rinsed and drained beans.....pink, black, black-eyed peas....whatever.  Once I added a splash of balsamic vinegar and called it a "salad."  I brought it to work for lunch, and it was great. 

Today I took my leftover broccoli rabe & bean concoction, microwaved it with some tomato sauce, and used it to top a single serve portion of pasta.  A bit of parmesan on top and it was a pretty good meal.  It inspired me to be thankful for lots of things.....healthy food, good friends, books....all that kind of stuff.

Yeah, it's Lent all right.  I get all introspective and tap into feelings of gratitude. 

(I like Lent!)


Friday, March 11, 2011

Getting a Handle On: Eating Your Veggies!


I am always happy to see Lent arrive.  It gives me an excellent excuse and motivation to make better choices in my life. 

It seems that, for me, anyway, I eat much more "healthy" in the summer, with its preponderance of fresh produce, like blueberries and tomatoes. 

Then late autumn comes, and then the holidays hit.  My home becomes filled with cookies and other goodies....both the kind with gluten (that others may give to me) and the gluten free kind, which I love to bake so that my GF family member can enjoy similar dishes. 

It's just too darn easy to eat these types of sugary/starchy/high fat foods.  It isn't hard to get them or keep them around to nibble on, and the cold weather keeps me inside, where they call to me.

Enter Lent.  YaY for Lent!  I can make some new resolutions that I am more apt to follow just because it's Lent.  This year I am avoiding snacks and really trying to increase my vegetable intake.

Leafy green vegetables are supposed to be the king of all vegetables. 
They are powerhouses of nutrition. 

I am going to buy something dark and green and leafy every week. 
I figure my skillets will get a good workout, too.

This week I purchased a bunch of broccoli rabe
I washed it and sliced it up.
I heated a little bit of olive oil in my 10" skillet,
added 2 cloves of garlic
        (that I minced up with the little dish grater that I got at the flower show),
and added the greens to the pan.
After they wilted but still looked bright green, I sprinkled on a little bit of salt.
(It doesn't make any sense to overdo it on salt when I'm trying to be healthy!)

They do have a "bite" to them, but my health books assure me that I will learn to like it.
And I think I will....

Tuesday, March 8, 2011

Easy Skillet Dinner for One (using leftovers)


Above is just another photo from the flower show....spring is coming!

Recently I came home from my Zumba class and needed to whip up something for myself for dinner.  I'm amazed at how easily one can use leftovers from the refrigerator to make a dinner in a cast iron skillet.  I previously made an omelette for one person with the 6" skillet (see post of 12/19/2010), and the other night I made this for myself in the 8" skillet:

Easy Skillet Dinner for One (using leftovers)

I heated up a tablespoon of lemon-pepper flavored olive oil,
added 1/3 of a red onion, chopped,
3/4 cup of cooked green beans, and
2 slices of deli ham, torn into pieces. 

I sauteed that together a bit, then
put on a sprinkling of garlic-pepper seasoning
(but I probably didn't need it due to the flavored oil I used...).

I beat up one egg with a Tbs of water
and put that in to cook.
It didn't make an omelette, it just coated the mixture somewhat.
(No, I wasn't looking for an omelette's effect....)

I sprinkled it all with parmesan to serve.
(I obviously have some Italian roots....)

When hubby came home, I told him,
"You missed a great dinner!"
(even though I probably wouldn't have made it if I was cooking for both of us....).

Hmmm....although it would be easy to double a recipe like this and use a larger skillet....


Saturday, March 5, 2011

Fraiche Mushroom Pasta (with chicken)

When I was at the Flower Show last weekend, I picked up this little thing to use with garlic:


You moisten the plate, which has sharp-ish bumps.  Slide your clove of garlic into the blue silicone tube on the left and roll it around to remove the peel.  Take your peeled garlic and rub it around on the plate, discarding the stem end.  It's supposed to be far superior to using a garlic press.  I'm not sure of that, but it looked like fun, anyway.

I went grocery shopping last week after a difficult day at work.  A tough day often makes me justify some impulse purchasing.  I spotted a container of "creme fraiche" in the deli area.  I had never tasted creme fraiche before, but I had heard about it, and my hubby actually had it once at a social event that I didn't attend.

I bought the container, and checked online for ways to use it.  I developed the following recipe, crossing my fingers that the family would like it. 

John came home from college last night for spring break.  I wanted to have a nice dinner for him.  I put my creation together last night, said, "Well, let's see how it tastes!"  
Lo and behold, we all liked it! 

I was surprised when I tasted the creme fraiche.  I expected it to taste like sour cream, but it didn't at all.  It was much creamier, and almost sweet.  Very nice.

Fraiche Mushroom Pasta (with chicken)
(serves 6)

Start water to cook your GF pasta.  I cooked up 16 oz of "Notta Pasta" fettuccini.
(It's a rice pasta.)

Take your 12" cast iron skillet.

Saute two cloves garlic, minced (but I used the cool grater dish above), and
16 oz of sliced fresh mushrooms
in 2 Tbs olive oil.

When it looks about ready, sprinkle with Italian herbs.

Add one 9-oz package Perdue Short Cuts (grilled Italian style),
which is cooked chicken that has been sliced up nicely for quick and easy use.

Add ~5 oz of white wine.  I used a Chardonnay from a single serve bottle.

Let that simmer a minute.

Add 8 oz of creme fraiche and let it just heat through.

Turn off your heat. 

Pour this over your cooked and drained pasta, in a big bowl.

Serve with the ever-beloved parmesan to sprinkle on top!


Tuesday, March 1, 2011

Chicken with LOTSA Garlic


I had an opportunity last weekend to go to the Hartford Flower Show.  I had never been to a flower show before, believe it or not!  I took LOTSA photos, spent LOTSA money, and had LOTSA fun.....even though I went all by myself.

I like this photo of butterflies courtesy of the "Magic Wings Butterfly Conservatory & Gardens" in South Deerfield, Massachusetts.  I'm fascinated by the way the butterflies reflect on the glass in this photo.  The clear wings of the butterflies in the center are very interesting.

The following recipe, which I made last week, is nice as we await Springtime.  I browned the chicken in my cast iron skillet, and finished the dish in my crock pot.  Having LOTSA garlic lifts my spirits the way butterflies and flowers can.

Chicken with LOTSA Garlic
(Serves 6)

In your skillet,
lightly brown 6 boneless/skinless chicken breast halves in 2 Tbs olive oil.

Place 12 new potatoes (or cut up potatoes for 6 servings)
in the bottom of a crock pot.

Add 1 onion, cut up as desired,
1 Tbs oregano, and
a whole head of garlic, peeled and minced.

Put your browned chicken on top of that.
Spoon a little garlic up onto the chicken,
drizzle it with another Tbs of olive oil,
give it a few turns of the pepper grinder, and
sprinkle it with a little more oregano.
I sprinkled the chicken with 1/2 tsp. salt, too.

Cover.  Cook 5-6 hours on high,
or 9-10 hours on low.

**Be sure to spoon the tasty glaze (that sits in the bottom of the pot) over the chicken.  The meat benefits from the moisture, and the flavor is awesome!**


 Those carrots were roasted in the cast iron skillet, like other vegetables I have posted about.

Tuesday, February 15, 2011

Breaded and Baked Boneless Chicken

Today is my Mom's birthday!

When I was first married, Mom was taking classes on painting.  She depicted this serene scene, gave it to me, and I have had it in my living room ever since. 


It's nice to have family-created items.

I had a dinner party for Mom this weekend, with 10 people at the table.  I find cooking for 4, 6, or even 8 not so bad, but 10 gets me a little nervous.  You need to double most recipes!  When I have this size of a group, I try to keep it simple, and I write out a timeline as well as a menu.  However, I forgot to plan on some minor disaster happening.....which it did, when the oven got turned off instead of the timer.  In the end, dinner was about 30 minutes late, but still delicious.  Here was my main dish:

Breaded and Baked Boneless Chicken

Preheat the oven to 425.

Take however many boneless chicken breast halves as you need. 
(I had way too many!  But that's okay because they make excellent leftovers.)

Bang them a little with a meat mallet to tenderize them slightly.

Spread the chicken with some olive oil on both sides. 

Roll the chicken in an appropriate coating.  In Whole Foods, I found an interesting pre-made coating mix called "Kariba Farms Wheat & Gluten Free NutCrusters" in an Almond-Lemon Flavor.  This contained almond meal, soy, flax and spices.  I used this coating mix until I ran out, then we quickly scrounged up some gluten free bread and whirled it in the food processor for a while, then adding parmesan, spices and salt to taste.  Both coatings were very good.  Tonight I will have leftovers of the breadcrumb-parmesan style, topped with tomato sauce and some provolone to make a chicken parmesan alongside some gluten free pasta. 

Coat the bottom of your cast iron skillet with some olive oil. 
Put your chicken in the skillet.

Bake the chicken (uncovered) for 30 to 35 minutes.  We always check our meat for done-ness with an instant-read meat thermometer.  I'd hate to find it wasn't cooked enough after it had been served!


Those little pieces are little bits of tenderloins and such that didn't cut neatly.  Mmmmmm....chicken nuggets!

The lighter-colored piece at the bottom right had the bread crumb mixture on it.

Tuesday, February 8, 2011

Chicken Sausage


How I am fighting the winter blues:

1.  I have flowers.

2.  I got my hair done with low-lights.

3.  I am wearing bright colors.

4.  I write 10 good things about each day in my journal at night.

5.  I exercise at Zumba class.

Of course, you can't do the exercise at Zumba, get flowers, or get your hair done if you can't get out of the house.....luckily we have had a bit of a break here.  The sun shone all Sunday, and it was glorious. 

Still a lot of snow, however....


On Friday I got out to do errands, which took twice as long as it would normally due to the difficulties driving (it's hard to see around the high snowbanks) and parking (there are very few spaces available due to all the snow, which is piled up wherever they could figure).  Whole Foods had their chicken sausage on sale.  Their basic mild and hot chicken sausages are gluten free.  (Always check this!!)  I took eight home and cooked them up.  They can go with gluten free pasta, into sandwiches, in soups, or whatever!

Chicken Sausage

Put your sausages in an appropriate cast iron skillet.
Put in a half cup of water.
Turn on the heat, cover, and let it bubble away for a while.
I let mine cook for about 30 minutes.  You want to fully cook the meat.
Uncover.
Let the remaining water boil off.
Brown on each side.
Eat some and save some for other uses.


Tuesday, February 1, 2011

Good Ol' Family Favorite Chili


I knitted this nice, cozy cowl for myself.  I wore it the next day after completing it....and I love it!  We need cozy and comforting things in this wild winter weather.

Here is one of my very favorite recipes.  It's one that my family has enjoyed for ages,
and has always been gluten free. 

HH's Good Ol' Family Favorite Chili

Take your cast iron skillet and brown 1-2 lbs of ground beef or turkey.  Drain any fat.

Browning is an important step.  Once I tried to skip this step....
the results were not pleasant!  :(

Mix the browned meat in your crock pot with:

1 15-oz can diced tomatoes,
1 6-oz can tomato paste,
1/2 cup water,
1-2 chopped onions,
1 19-oz can red kidney beans, drained and rinsed,
garlic or garlic powder to taste,
1 Tbs chili powder, and
1/2 tsp salt.

Optional additions:
 1-2 red, green or yellow peppers, chopped,
1 tsp oregano, and/or
1/2-1 tsp cumin.

Cook 4 hours on high or 8 hours on low.

Serve with some shredded cheddar cheese sprinkled on top. 

This is a comforting dish on a cold day!


MMMM.....hot and luscious!


Peter had to put a smiley face on his!

Sunday, January 30, 2011

Off the Handle: Holiday Pea Soup with Ham

Here is a photo of the snow coming down, looking beautiful. 
It was hard to capture the flakes, but the sky looked kind of like this:


Unfortunately, all this snow has resulted in this....picturesque, but not good for the roof:


Here is what it looks like when the ice dams leak water into your home:


I wanted to post yesterday, but I was a little busy with the roof clearing operation. 
Trust me, this is an all-day affair, even with four adults working at it.
(A big THANK YOU to Katie and Andy for their help!)

The recipe for today is a nice one for after a cold and wet day of work. 
Unfortunately, I somehow never took photos when I made it after Christmas. 
(I think we are generally too excited when enjoying this soup to remember taking photos.) 

This is the last of my winter "holiday" recipes.  It's only a "holiday" recipe because that is when we tend to have a HoneyBaked Ham, specifically Christmas and Easter.  These hams are awesome!  I have never had pea soup from a HoneyBaked Ham bone that didn't get devoured quickly.  And yes....they are gluten free!

Holiday Pea Soup with Ham
Serves 8.

This takes all afternoon (4 hours or so), so plan ahead!

Rinse a 1-lb package of dried green split peas.

Put it in an 8-qt. pot.  Add 8 cups of water,
bring to a boil on the stove, let it boil a minute,
then turn off the heat, cover it, and let it sit an hour.

Do not drain....Add a ham bone from a HoneyBaked Half Ham (or your favorite ham). 
If you want, you can tie the bone in some cheesecloth to keep little bones from separating out.
Cover it again, turn the stove to low, and let it simmer an hour. 

Turn off the heat again.  Take out your ham bone and put it on a platter.  Let it cool a little.  Take a knife and pull off the meat.  Cut up the meat into small pieces.  I am pretty picky at this point, and if it's not a piece of meat I'd love to pop into my mouth then and there, then I don't use it.  I don't go for fatty pieces!

Make sure there are no little bones sitting around in your pot. 

Put the cut-up meat back into the pot.  Discard the bone and other stuff.  I usually put this into a plastic bag before putting it in the trash.  Who wants messy trash?

Add a chopped onion, a shredded carrot, and some parsley
You may want to add more leftover ham, if you have it. 

Turn on your stove's burner to low again and let it simmer another 2 hours. 

Taste and see how the seasonings are.  I don't believe I ever had to add anything at this point.  The saltiness/flavor from the ham is perfect!

This is one of those dishes that actually tastes even better the second day.

Tuesday, January 25, 2011

Beef and Veggies in a Skillet


Today we have snow yet again.  Tomorrow afternoon we are expecting the beginning of still another storm. 

The unusually intense weather here in Connecticut is wearing on all of the residents.  It makes me just want to curl up and hibernate for remainder of the winter with a good book....but instead, I get up, use the treadmill, shovel snow, get to work when it's possible, clean up all the tracked-in debris when we forget to take off shoes, and make dinner.

A cast iron skillet is great because I can whip up dinners with relative ease, browning meat on the stovetop and then finishing a dish in the oven.  Recently I made the following with items I had in the house.  Everyone loved it!  It would be easy to adapt this method to using other meats and vegetables. 

Beef and Veggies in a Skillet
Serves 6

Preheat the oven to 350.

In a 12" skillet,
brown 2 lbs lean ground beef
with 1 onion, chopped, and
2 peppers of various colors, chopped.
(I used a whole red pepper, half of a yellow pepper, and half of an orange one.)

Add 2 potatoes, diced, and
1 can stewed tomatoes.

Bake one hour, loosely covered with foil.

Sprinkle with 1 cup of shredded cheddar cheese.

Cover and let sit 10 minutes while it melts.

Serve!

Sunday, December 26, 2010

Christmas Pierogi


Like the star on our tree?

Last year we couldn't find gluten free pierogi for our Christmas Eve dinner.  It was our first year dealing with gluten issues and we really didn't know what we were doing!  I asked the "Silly Yaks" list, which has been a wonderful source of information, which led to this recipe, which I continue to tweak.  If you know more about gf pierogi than I do, please drop me a line and let me know any tips.  I'll surely appreciate it!

This is a wonderful team-building experience for the holidays! 
Try making pierogi with your gluten free loved one!

HH's Gluten Free Pierogi  (makes about 2 dozen)

1.  Make your filling:

Take 2 lbs of potatoes and boil them until soft.  Drain.
Mash them with ~6 oz of sharp cheddar cheese
and some salt, pepper and garlic powder to taste.
The mixture will be stiff.
Set it aside.

2.  Make your dough:

Put in your heavy duty mixer:

2 cups Bob's Red Mill GF flour blend,
1 cup rice flour,
2 tsp xanthan gum, and
1 tsp salt. 

Blend these dry ingredients.
Add 2 beaten eggs and blend.

Add about 2/3 cup of cold water in a thin stream, blending all the while.
You want to just add enough water to get the mixture dough-like.
I needed just an extra tablespoon or so for this year's batch.

3.  Assemble the pierogi:

Put the dough on a plate, covered with a damp cloth.

Have ready:
The plate, the dough, and a damp cloth,
lots of counter space,
lots of wax paper,
      (Note from 12/2011:  A silicone mat was very helpful to roll the dough on!)
a full can of cooking spray,
your rolling pin,
your dough,
a knife for lopping off pieces of dough to roll,
a 4-inch diameter crumpet ring,
a spatula for picking up your circles of dough,
your filling,
a plate to do the filling on,
a teaspoon for putting on the filling,
a fork for sealing, and
a platter to put the pierogi on.

Roll out the dough
between two pieces of wax paper sprayed with cooking spray,
to "pasta thickness."
You will need to frequently change the wax paper and spray it each time.
Cut out 4-inch circles with the crumpet ring.
Pass this to your pierogi partner who will fill it.

The pierogi partner places a small amount of filling near the center of the circle
and then folds the circle in half,
sealing the edges with a fork.

4.  Take a break:

Eat up the remaining mashed potato mixture for lunch or a snack.

5.  Cook the pierogi:

Heat up your cast iron skillet.  Have a pair of TONGS ready.  Do not use a spatula. 
These are slippery little devils!  (Ask how I know.....)

Using a combination of olive oil and butter, saute the pierogi until brown.

(This year I used some Earth Balance margarine.)

(I have previously been afraid to boil these, figuring it is safer to brown them in the pan to keep them from falling apart!  In 12/2011, however, I boiled a few for 3-5 minutes, or until they float, and they were fine!)

6.  Cook up onions:

Chop up 1-2 onions.
Saute these in olive oil/butter, also!

7.  Layer your dish.

Layer the cooked pierogi in a microwaveable dish
with sauteed onions, and
a little bit of water.

Another idea is to layer it in a small crock pot if you only need to hold it a few hours.
In general, heat up when you are ready to eat them, unless you are eating them right away.

Don't omit the water!  The pierogi will be hard without it, especially if you are using a crock pot.

Another idea is to layer it in a small crock pot if you only need to hold it a few hours.

Here are some photos:


Tuesday, December 21, 2010

Flying Off the Handle: Chicken Curry Stew


I am tired today.  I have been doing some holiday baking, wrapping, shopping, and card-writing.  There is still a lot more to do.  I am sure the reader can relate.

Today John went off with his friends for a little holiday sightseeing and shopping in Newport.  I told him I would have a nice dinner when he came home, for him and his friends.  What to serve four young adults when you aren't quite sure when they are coming?

The crock pot is tailor-made to days like this.....

This was the second time I made the following chicken curry stew.  When you see a range of amounts, it reflects the first time I made it and the second time I made it. 
(I added more vegetables for more diners.) 

I never used coconut milk before this recipe, and was pleasantly surprised at how this came out!

HH's Chicken Curry Stew
(Serves 6-8)


Put the following in your crock pot:

1-1/2 lbs boneless chicken breast, cut into chunks,
1 onion, chopped,
1 to 2 potatoes, cut into small chunks,
9 to 16 oz frozen baby lima beans,
zero to 16 oz of sliced carrots (or baby carrots),
1 cup to a full 13-oz can of light coconut milk,
1 12-oz can diced tomatoes (I like mine fire roasted!),
1 Tbs cumin,
1 Tbs curry powder, and
1 tsp salt.

Mix it up.

Put the cover on your crock pot. 
Set it to high for 5 hours, or low for 10 hours.

Wave bye-bye as you allow your crock pot to do the work.
Serve with some parsley or cilantro on top as a garnish.


Sunday, December 19, 2010

Easy Unwind Ahh-melet


Brrr!  Baby, it's cold outside!

And it's busy these days!

Recently I got home from my Zumba class to an empty house. 
I wanted a nice dinner but no fuss.  It was just me that night.  Hmmm....

I took out my 6-inch cast iron skillet and whipped up a nice omelet right on the spot. 
It was easy, fast, and satisfying. 
The 6-inch size turned out to be perfect for a one-egg omelet. 
(BTW, the 8-inch was perfect for a two-egg omelet when I made one earlier.)
 

Easy Unwind Ahh-melet

In a 6-inch skillet, heat up 1/2 Tbs oil on medium heat.

Scramble up an egg with 1 Tbs water
(This is a trick we learned years ago at a food show.  It makes the egg fluffier.)

Add the egg-water mixture to your pan. 

Sprinkle the egg with garlic powder and your seasonings of choice
(I like Italian seasoning.)

Once it's looking kind of set, layer on your filling. 
Check your refrigerator....what do you have? 
I cut up a mozzarella stick and sprinkled it all with parmesan to make a cheese omelet. 

Carefully fold the omelet over and let it cook a minute or so.

Flip it over and cook it a little more.

Light a candle.  Serve with your favorite relaxing music. 
I turned on Josh Groban. 
I also recommend a nice cup of decaffeinated tea.