The Hot Handle

A blog interspersed with occasional gluten free recipes.

Please note: If you have a family member who requires a gluten free diet, be sure to use a cast iron skillet that has never previously touched gluten....and if it has, scrub it all down completely and re-season, to be on the safe side.

Looking for information on Celiac Disease? There are many good sites, but here is one to get started with:
www.celiacdisease.net/celiac-disease-101.


Tuesday, January 18, 2011

Spinach-Stuffed Mushrooms


This photo was taken in Woodstock, Vermont.  We were able to get away for a quick cross-country ski weekend earlier this month.  We had just enough overnight snowfall to make the skiing very nice.  It was fun.

In Connecticut we have way more snow than this now. 
Today we have freezing rain on top of that. 

No fun.

At least it is fun to cook inside.  Over the weekend I made stuffed mushrooms as a side dish to our chicken dinner.  The cast iron skillet does a great job with them!!

Spinach-Stuffed Mushrooms

Preheat the oven to 375.

Defrost 8 oz of frozen chopped spinach
(I usually cook it halfway in the microwave, then let it cool.) 
Squeeze out the excess liquid. 

Clean a 14-oz package of stuffing mushrooms.
Take the stems out.  Chop them up. 

Mix the spinach and chopped mushroom stems with:
1/4 tsp garlic powder,
1 egg, 2-4 Tbs of parmesan, and
1/4 cup gluten free bread crumbs.

Heap this mixture into all the mushroom caps.
Place them into a greased 10-inch skillet.
Bake 30 minutes.

Sunday, January 16, 2011

Off the Handle: Disaster Dessert


January has not been a fun month.

I had an ill family member, we were pounded with over two feet of snow in one day, and now I need a root canal. 

Anyway....

Last night we wanted to have a nice GF dinner for John before he heads back to college.  The meal was excellent, with some old favorites like skillet potatoes, but dubbed last night as "Belted Galloway" potatoes due to the white strip hubby peeled around red potatoes before we sliced and baked them:


The Belted Galloways are the cows that look like oreo cookies....

(The recipe for skillet potatoes is noted on my post of August 5, 2010.)


During the day, I decided to make a lemon cake from a mix.  Delicious cake.....made with chestnut flour, featured in my post of July 17, 2010. 

Except that as I pulled the cake out to test it, the whole dang thing slipped out of my grasp, landing upside down over the crack between the oven floor and the oven door. 

Yeah, I was in tears.....

Katie and Andy had just arrived, and assisted with the rescue by picking up all the cake on the oven floor.  The remainder sat in the pan, with a huge crater across it. (My family was calling it "crater cake" at this point.)

We pondered what to do for a while.

Trifle?  I'm not sure John can deal with the amount of cornstarch in pudding.  We thought of cooking up some apples and filling the crater with that.  A lot was going on in the kitchen, however, so another cooking project didn't seem to work out.

I looked in my basement.  I had a jar of lemon curd!

I spread the lemon curd all over the wrecked cake after it cooled.  We cut it up and served it with a dollop of whipped cream.  And hey....it was pretty good!


They say that when life hands you lemons, make lemonade.
We made a pretty good lemony dish, which I call "disaster dessert." 

Wednesday, January 5, 2011

taking a break

Sorry, no new posts for a week or two....looking forward to sharing more gluten free recipes soon, however....

The Hot Handle

Sunday, January 2, 2011

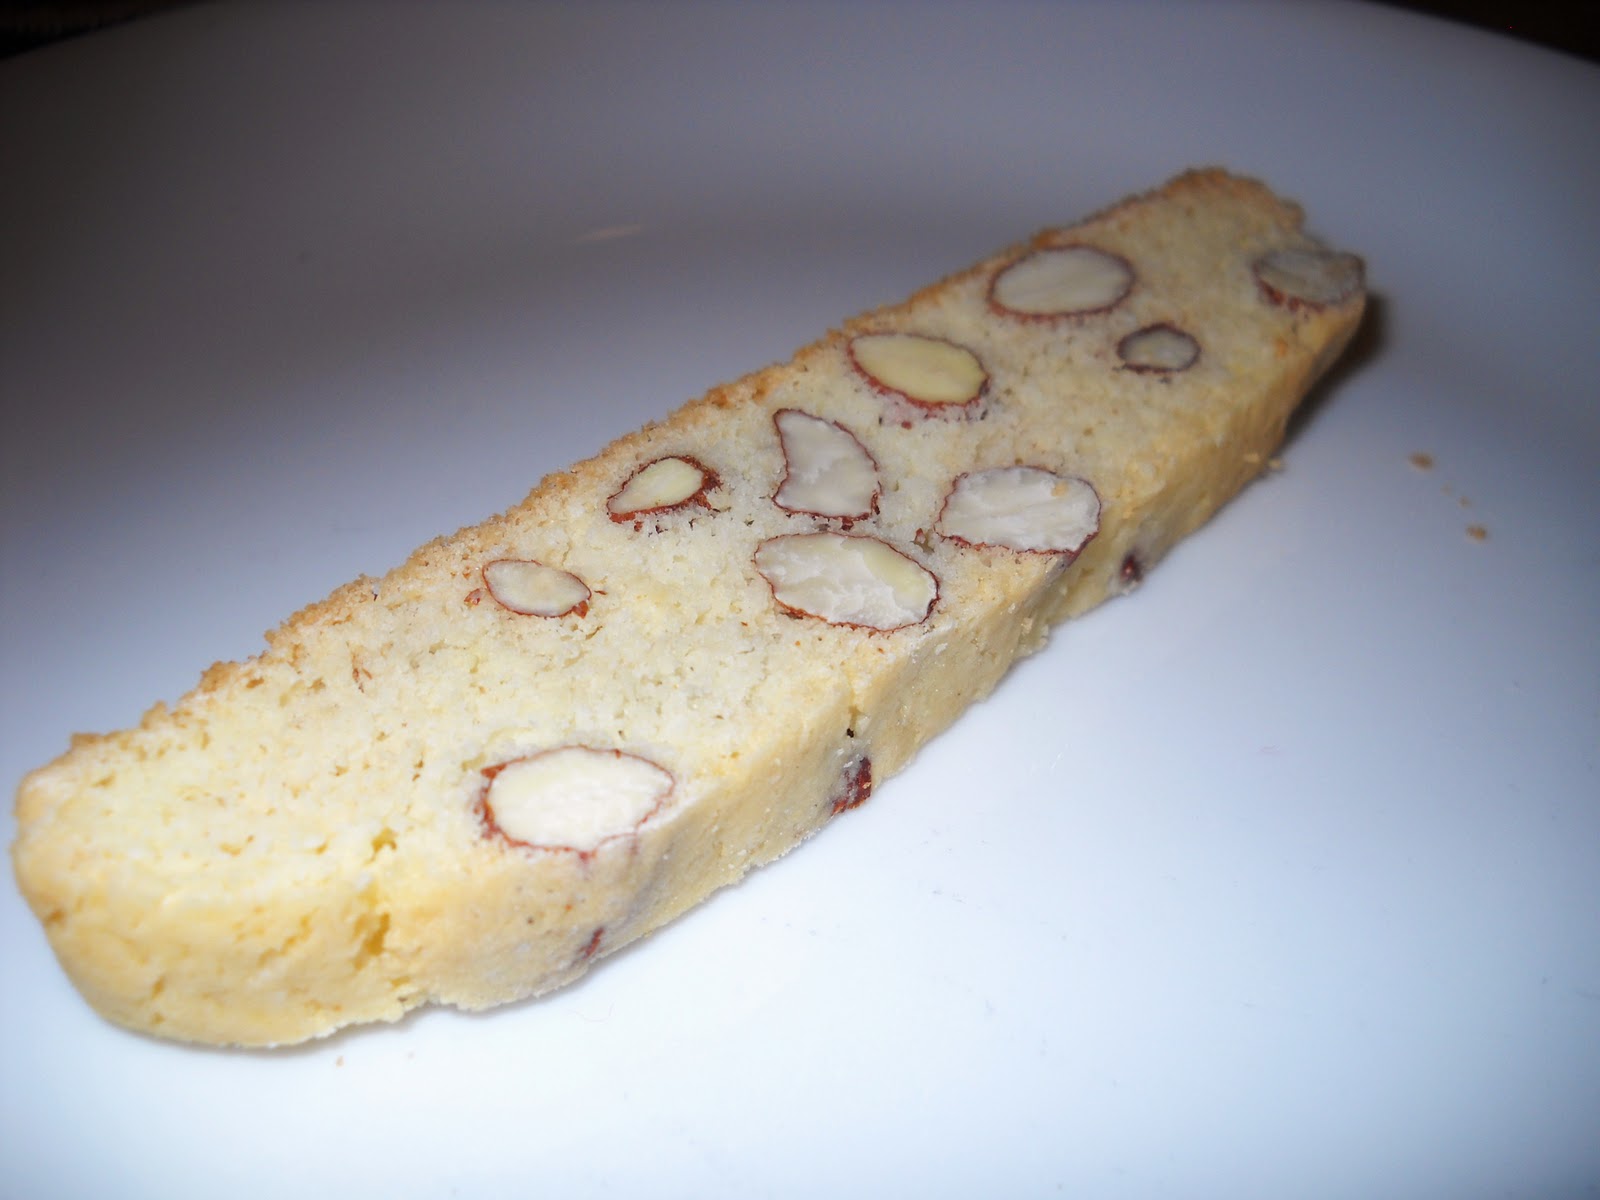
Off the Handle: Almond Biscotti


This little angel on my tree has a funny story.

One year, probably when I was in my teens, I was helping Mom decorate the tree.  We came across this paper angel, and could not recall where it came from.  We didn't remember it at all!  As I held the ornament up, it was apparent that she was hanging from her neck.  "She must have been a *bad* angel!"  We all laughed so hard that we were practically rolling on the floor.  Since then I have kept the angel to remember that fun time.  (She gets hung on the back of the tree.)

I love putting up the ornaments and remembering the story behind many of them.  Of course, every once in a while we find one that we can't remember at all, like this angel.  This week I'd better get around to taking them down again.  That isn't as fun.

Below is an adaptation of my previous biscotti recipe.  This is the first year I did this....and they came out excellent.  Will definitely do it again.....many times.  Biscotti is one of my very favorite treats.

HH's Gluten Free Almond Biscotti (makes 4 dozen)


Preheat oven to 350.

Put in your heavy duty mixer’s bowl:

1 16-oz pkg GF Bisquick (This measured out as a little under 3 cups.),
1 cup sugar, and
½ tsp ground mace.

(No salt....There is already salt in the Bisquick.)

Stir it up to mix. I use the dough hook feature,
because the next step makes a pretty thick batter.

Add 4 eggs (or equivalent of egg substitute, like Egg Beaters), and
2 tsp almond extract.

You may have to scrape the bowl to get it all combined.

Now add 2 cups whole almonds (approx 8 oz).

Use the dough hook a little more, then you’ll probably have to mix some by hand.

Divide the dough in half and spread it onto a GREASED baking sheet
to make 2 strips about 12 inches long and 3 inches wide.
Smooth dough with wet fingers for this.

Bake 25 min.

Reduce oven temperature to 325.

Cool in pan 10 min, then transfer to a wire rack to cool some more.

When it’s cool enough to handle you can check to see if it slices well.
Slice each loaf into 24 pieces in this way:

Using a quality large, serrated bread knife, slice each loaf in half.
Now each half will yield 12 pieces.
Score each half at the halfway point, then halfway across each side, making 4 sections.
You now need to slice your biscotti by making 3 pieces within each section.

Lay these pieces flat on ungreased baking sheets.

Bake 10 min at 325.

Turn pieces over.

Bake 10 more minutes.

Cool on wire racks.


Wednesday, December 29, 2010

Off the Handle: "The World's Only Good Fruitcake"


This is a picture of a throw that I thankfully finished in time to present to Katie and Andy for Christmas.  I started it right after their wedding, and finished it four months later.  Ever notice how the more time and effort something takes, the more proud you are of the finished product?

That twisted fringe is a favorite of mine for this type of project.  Very durable, and no unraveling!

But this isn't a knitting blog....

The cake below is something that takes a while, but it is not quite as labor-intensive as the pierogi from the last post.  I made it last year because we needed a substitute for traditional fruitcake, which my brother loves to serve on Christmas Eve.  I'm not clear where I got my inspiration for this particular recipe.....I think it was from the Silly Yaks list again.  Like everything else I do, I made my own personal changes and this is the result from two Christmases worth of baking. 

John, who never cared for traditional fruitcake, was very enthusiastic about this cake.  He refers to this as "the world's only good fruitcake"  ....hence the nickname.

Gluten-Free Fruit-Full Christmas Cake
(a.k.a., “The World’s Only Good Fruitcake”)
(serves 16)

Ingredients:

Almost 2 lbs (or 4 cups) cut-up, dried mixed fruit (cherries, cranberries, apricots, golden raisins, cut-up prunes, dried figs….whatever suits your fancy) (Note: Don’t use fruit from bulk bins due to the possibility of cross contamination with gluten. Inspect your packages….and don’t use the fruit if it says anything like, “manufactured on equipment shared with wheat.”)

1 cup brandy, divided into 2/3 and 1/3 cups
¾ cup butter, softened (1 ½ sticks)
1 cup brown sugar
3 eggs
1 ¼ cup Bob's Red Mill GF biscuit & baking mix (has xanthan gum and baking powder in it)
          (note from 12/2011:  Bob's Red Mill worked better than a different mix used this year!)
1 ½ teaspoons ground nutmeg
½ teaspoon ground cloves
½ cup slivered almonds
½ cup apricot jam

Directions:

Place dried fruit and 2/3 cup brandy in a bowl with a tight-fitting cover.
Let it sit at least overnight (or up to 1 week), stirring/shaking it occasionally.

Preheat oven to 300 degrees F. Lightly grease an 8” round, 3” high cake pan.
Line bottom and sides of pan with one sheet of parchment paper. (I scrunch it in.)

Using a heavy duty mixer, cream the butter and sugar. Add eggs, one at a time, beating well after each addition. Scrape the bowl and beat again until it’s uniform in texture.

In a separate bowl, mix the baking mix and spices. Add this to the butter-sugar-egg mixture and blend. Add your marinated fruit and stir until it’s well-combined.

Scrape this mixture into your parchment-lined pan. Press it into the pan and smooth the top surface with wet fingers. Sprinkle the slivered almonds evenly on top, and press them into the batter slightly with wet fingers. The batter may be even with the top of your pan. That’s okay.

Bake your cake for approximately 1 ¾ hours. A tester inserted into the center needs to come out clean. Pour the remaining 1/3 cup brandy over your hot cake.

Allow the cake to cool completely in the pan before transferring it to a plate.

Place the apricot jam in a microwaveable custard cup. Microwave it on high for 30 seconds or until warm. Spread this over the top of your cake. Allow it to soak in a while and cool, then you can cover it with plastic wrap for storage.

Notes:

You will need to start this cake at least 1 day ahead.
Use a serrated knife and a sawing motion for slicing purposes.
Store it covered, but beware: everyone will continually nibble at this cake!


Sunday, December 26, 2010

Christmas Pierogi


Like the star on our tree?

Last year we couldn't find gluten free pierogi for our Christmas Eve dinner.  It was our first year dealing with gluten issues and we really didn't know what we were doing!  I asked the "Silly Yaks" list, which has been a wonderful source of information, which led to this recipe, which I continue to tweak.  If you know more about gf pierogi than I do, please drop me a line and let me know any tips.  I'll surely appreciate it!

This is a wonderful team-building experience for the holidays! 
Try making pierogi with your gluten free loved one!

HH's Gluten Free Pierogi  (makes about 2 dozen)

1.  Make your filling:

Take 2 lbs of potatoes and boil them until soft.  Drain.
Mash them with ~6 oz of sharp cheddar cheese
and some salt, pepper and garlic powder to taste.
The mixture will be stiff.
Set it aside.

2.  Make your dough:

Put in your heavy duty mixer:

2 cups Bob's Red Mill GF flour blend,
1 cup rice flour,
2 tsp xanthan gum, and
1 tsp salt. 

Blend these dry ingredients.
Add 2 beaten eggs and blend.

Add about 2/3 cup of cold water in a thin stream, blending all the while.
You want to just add enough water to get the mixture dough-like.
I needed just an extra tablespoon or so for this year's batch.

3.  Assemble the pierogi:

Put the dough on a plate, covered with a damp cloth.

Have ready:
The plate, the dough, and a damp cloth,
lots of counter space,
lots of wax paper,
      (Note from 12/2011:  A silicone mat was very helpful to roll the dough on!)
a full can of cooking spray,
your rolling pin,
your dough,
a knife for lopping off pieces of dough to roll,
a 4-inch diameter crumpet ring,
a spatula for picking up your circles of dough,
your filling,
a plate to do the filling on,
a teaspoon for putting on the filling,
a fork for sealing, and
a platter to put the pierogi on.

Roll out the dough
between two pieces of wax paper sprayed with cooking spray,
to "pasta thickness."
You will need to frequently change the wax paper and spray it each time.
Cut out 4-inch circles with the crumpet ring.
Pass this to your pierogi partner who will fill it.

The pierogi partner places a small amount of filling near the center of the circle
and then folds the circle in half,
sealing the edges with a fork.

4.  Take a break:

Eat up the remaining mashed potato mixture for lunch or a snack.

5.  Cook the pierogi:

Heat up your cast iron skillet.  Have a pair of TONGS ready.  Do not use a spatula. 
These are slippery little devils!  (Ask how I know.....)

Using a combination of olive oil and butter, saute the pierogi until brown.

(This year I used some Earth Balance margarine.)

(I have previously been afraid to boil these, figuring it is safer to brown them in the pan to keep them from falling apart!  In 12/2011, however, I boiled a few for 3-5 minutes, or until they float, and they were fine!)

6.  Cook up onions:

Chop up 1-2 onions.
Saute these in olive oil/butter, also!

7.  Layer your dish.

Layer the cooked pierogi in a microwaveable dish
with sauteed onions, and
a little bit of water.

Another idea is to layer it in a small crock pot if you only need to hold it a few hours.
In general, heat up when you are ready to eat them, unless you are eating them right away.

Don't omit the water!  The pierogi will be hard without it, especially if you are using a crock pot.

Another idea is to layer it in a small crock pot if you only need to hold it a few hours.

Here are some photos:


Tuesday, December 21, 2010

Flying Off the Handle: Chicken Curry Stew


I am tired today.  I have been doing some holiday baking, wrapping, shopping, and card-writing.  There is still a lot more to do.  I am sure the reader can relate.

Today John went off with his friends for a little holiday sightseeing and shopping in Newport.  I told him I would have a nice dinner when he came home, for him and his friends.  What to serve four young adults when you aren't quite sure when they are coming?

The crock pot is tailor-made to days like this.....

This was the second time I made the following chicken curry stew.  When you see a range of amounts, it reflects the first time I made it and the second time I made it. 
(I added more vegetables for more diners.) 

I never used coconut milk before this recipe, and was pleasantly surprised at how this came out!

HH's Chicken Curry Stew
(Serves 6-8)


Put the following in your crock pot:

1-1/2 lbs boneless chicken breast, cut into chunks,
1 onion, chopped,
1 to 2 potatoes, cut into small chunks,
9 to 16 oz frozen baby lima beans,
zero to 16 oz of sliced carrots (or baby carrots),
1 cup to a full 13-oz can of light coconut milk,
1 12-oz can diced tomatoes (I like mine fire roasted!),
1 Tbs cumin,
1 Tbs curry powder, and
1 tsp salt.

Mix it up.

Put the cover on your crock pot. 
Set it to high for 5 hours, or low for 10 hours.

Wave bye-bye as you allow your crock pot to do the work.
Serve with some parsley or cilantro on top as a garnish.